In this guide, we create an iOS Configuration Profile using the Restrictions profile type in order to define baseline security and device password requirements.
Create an iOS Configuration Profile
From the home dashboard, navigate to Devices > Configuration Profiles.
Select the ‘Create Profile’ button.

Select ‘iOS/iPadOS’ as the platform.
Select ‘Device Restrictions’ as the Profile Type and then select ‘Create’.

Set a Name and Description.
**Example**
Name: iOS – Device Restrictions Profile
Description: Device Restrictions profile for iOS devices.

Select ‘Next’
For the purposes of this training course, the following example baseline configuration profile settings will be tailored to an Unsupervised device:
**Example**
App Store, Doc Viewing, Gaming
- Treat AirDrop as an unmanaged destination: Yes
Cloud and Storage
- Force encrypted backup: Yes
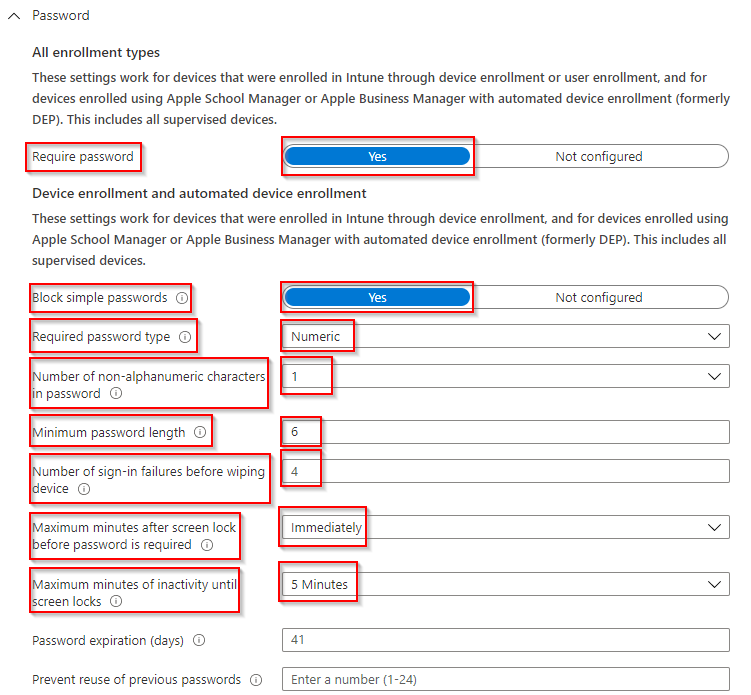
Password
- Require password: Yes
- Block simple passwords: Yes
- Required password type: Numeric
- Number of non-alphanumeric characters in password: 1
- Minimum password length: 6
- Maximum minutes after screen lock before the password is required: Immediately
- Maximum minutes of inactivity until screen locks: 5 minutes
Show or Hide Apps
- Type of apps list: Hidden apps
- Apps list: (Microsoft kindly provide a list of known Apple native app bundle ID’s)
- App bundle ID: com.apple.gamecenter
- App Name: Game Center
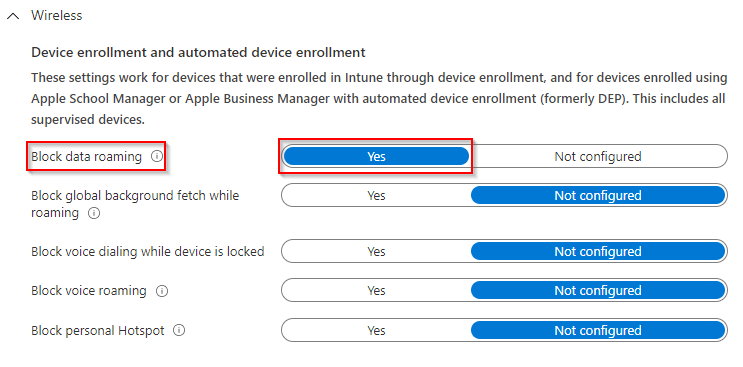
Wireless
- Block data roaming: Yes


Select ‘Next’.
Under Assignments, select ‘Add Groups’.

In this example, the ‘Corporate Devices’ group will be selected.
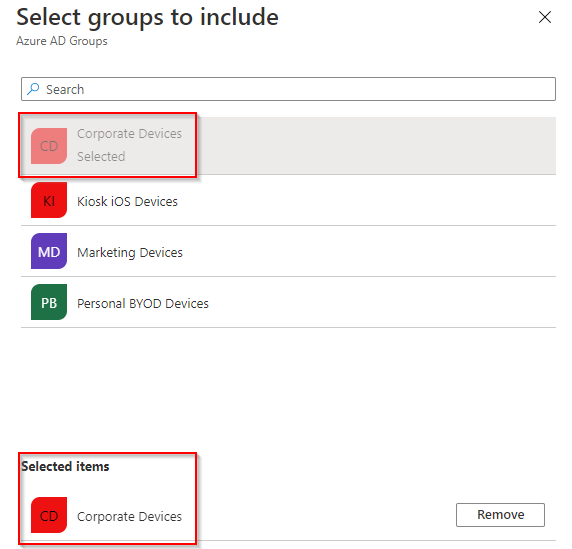
Select ‘Select’ to add your Azure AD Group.
Select ‘Next’ and then ‘Create’.
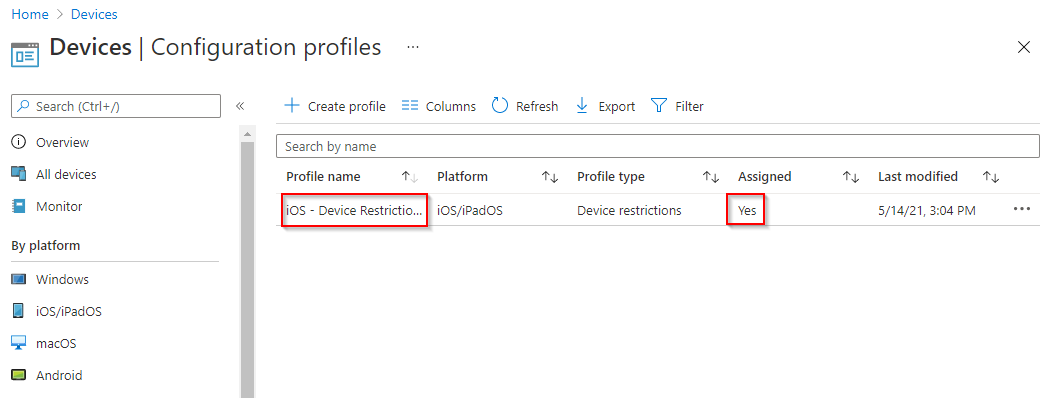
Once created, you will see the configuration profile appear in the list ready for use.
 See in Action
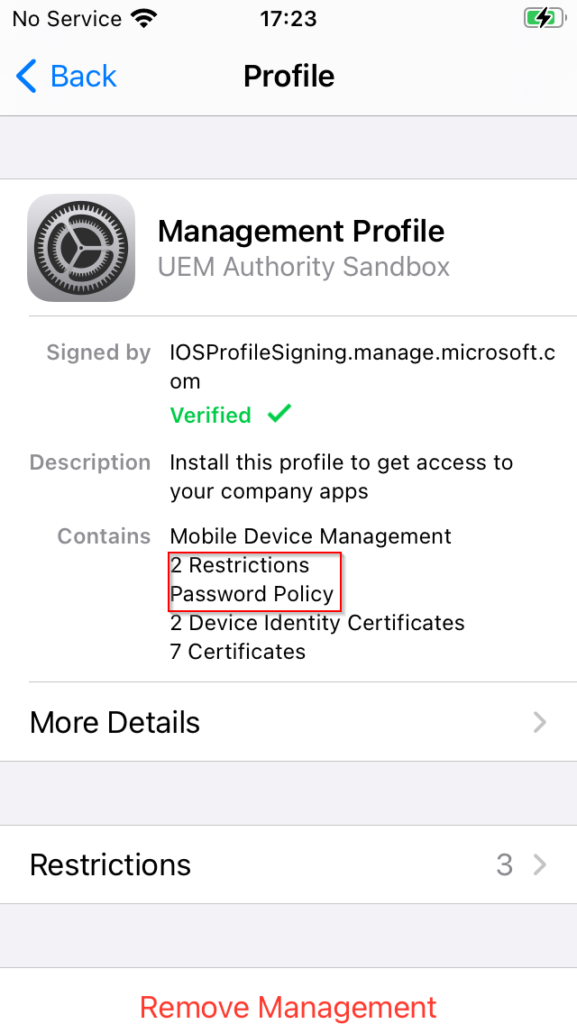
Installed configuration can be validated on the device by the user. Observing our enrolled device with the setting app, under General > Device Management > Management Profile, we can see “2 Restrictions” and “Password Policy” listed in the Contains list.
Selecting Restrictions, we can further validate device restriction settings match the Endpoint Manager deployed configuration profile we created.
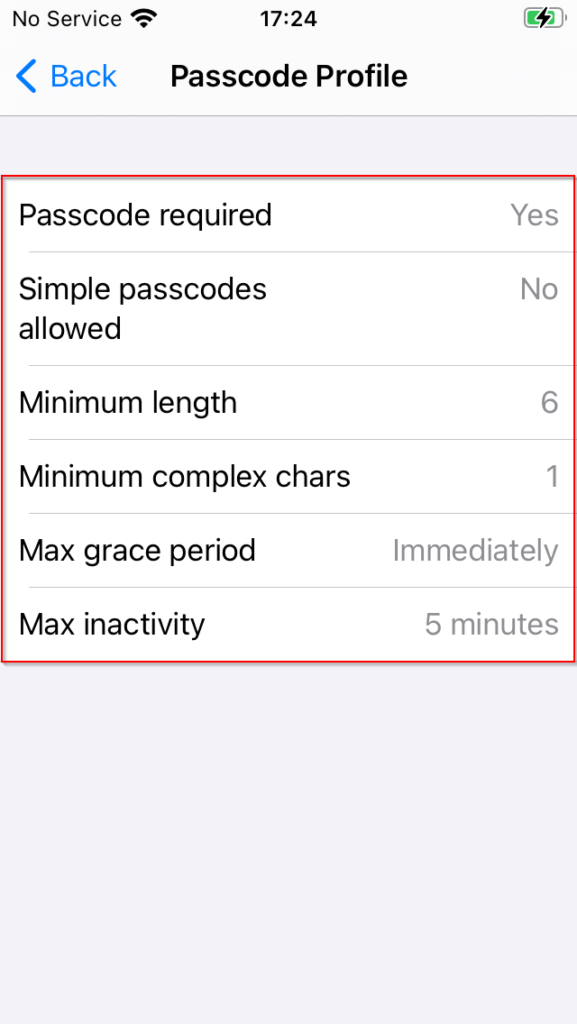
Drilling down into more detail by selecting the password policy, again, we can validate the password policy being enforced on the device matches the Endpoint Manager deployed configuration profile.

Within the Endpoint Manager portal, we can validate the configuration profile has been successfully installed on the device by navigating to Devices > All Devices.
Selecting the device entry, under Device Configuration on the left side menu, we can see the configuration profile we created successfully installed.
