In this guide, we create an App Configuration policy in order to demonstrate how to pre-provision the Outlook app.
App Configuration is a way to streamline, and somewhat automate (to a degree), setup of work deployed/managed apps, to ensure employees are productive within minutes.
Create an App Configuration Policy
From the home dashboard, navigate to Apps > App Configuration Policies.

Select the ‘Add’ button and then select ‘Managed Devices’.

Set a Name and Description.
**Example**
Name: iOS – Outlook App Configuration Policy
Description: App Configuration policy for Outlook on iOS.
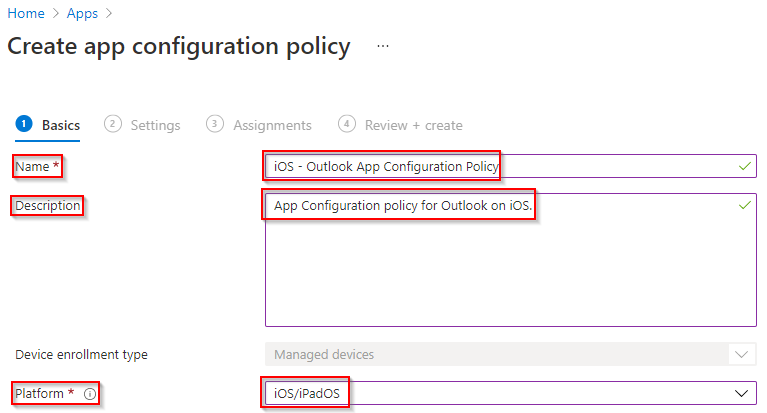
Select iOS/iPadOS from the Platform dropdown.

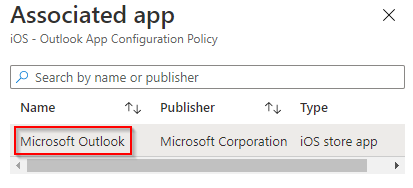
Press the ‘Select app’ button, select Outlook from the list and then press ‘Ok’.
Select ‘Next’.
Select ‘Use Configuration Designer’ from the Configuration Settings Format dropdown.

For the purposes of this training course, the following Outlook App Configuration settings will be set:
**Example**
Email Account Configuration
- Configure email account settings: Yes
- Authentication type: Basic authentication
- Username attribute from AAD: User Principal Name
- Email address attribute from AAD: Primary SMTP Address
- Email Server: outlook.office365.com
- Email Account Name: Corporate Email
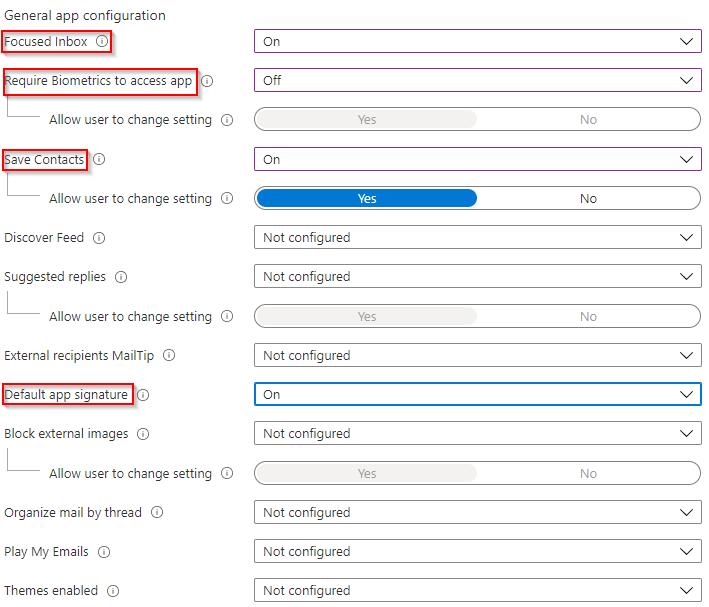
General App Configuration
- Focused Inbox: On
- Require Biometrics to access app: Off
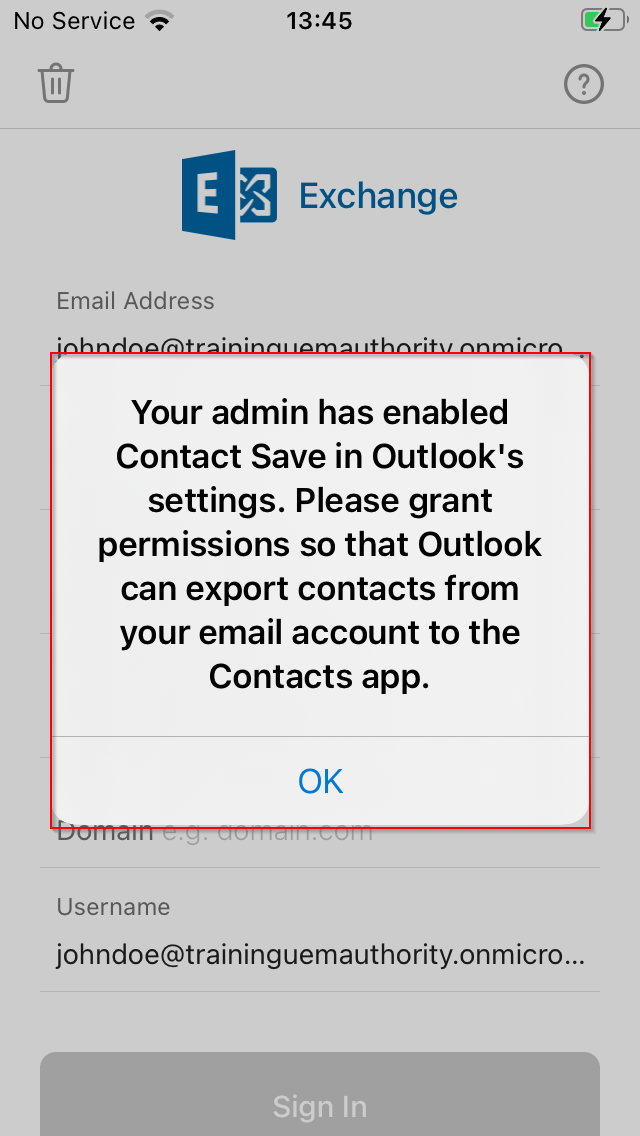
- Save Contacts: On
- Allow user to change settings: Yes
- Default app signature: On

Select ‘Next’.
Under Assignments, select ‘Add Groups’.
In this example, the ‘Corporate Devices’ group will be selected.
Select ‘Select’ to add your Azure AD Group.

Select ‘Next’ and then ‘Create’.
Once created, you will see the App Configuration Policy appear in the list ready for use.

See in Action
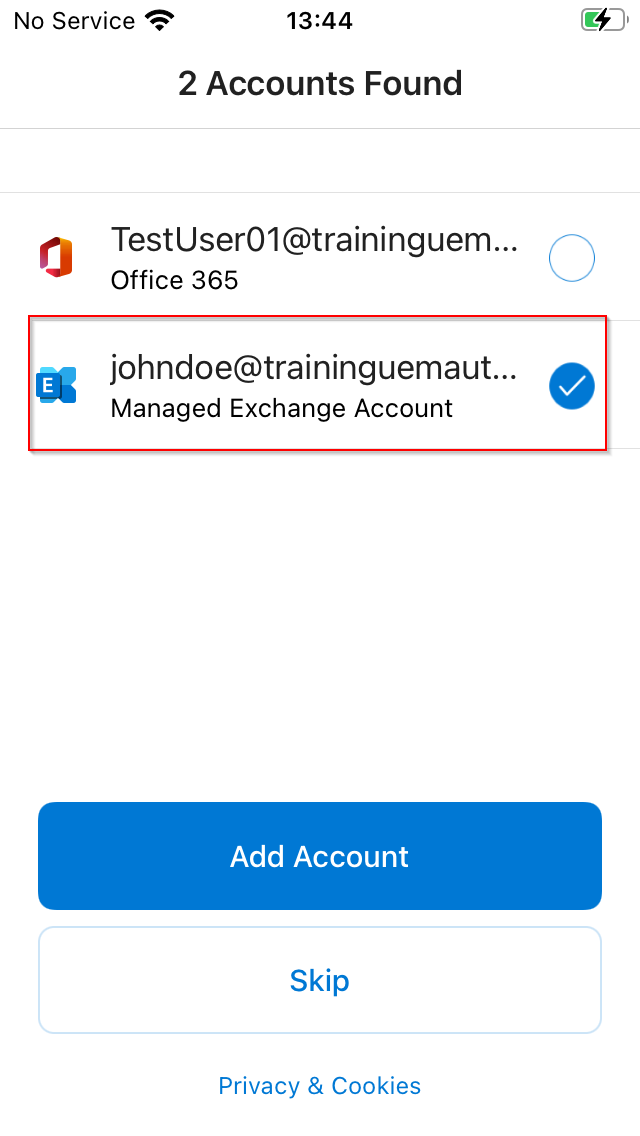
App Configuration can be enabled and validated on the device by the user. Observing our enroled device in Outlook, we can see App Configuration has detected and pre-populated our enroled user account – johndoe@traininguemauthority.onmicrosoft.com
After selecting ‘Add Account’, we sign in to complete authentication.


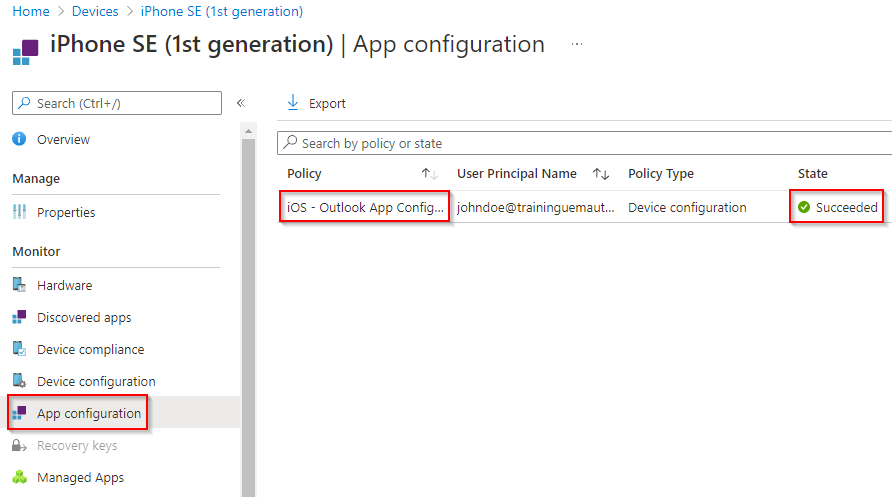
Within the Endpoint Manager portal, we can validate the App Configuration policy has been successfully installed on the device by navigating to Devices > All Devices.
Selecting the device entry, under App Configuration on the left side menu, we can see the App Configuration policy we created successfully installed.