The information on this course is provided ‘AS IS’ with no warranties and confers no rights. This course does not represent the views of my employer. All content on this site is solely my own personal views and recommendations.
Introduction
Guide
Episode 5 – Device Categories & Azure AD Groups
Create Device Categories
Sign in to your Endpoint Manager portal by browsing to https://endpoint.microsoft.com
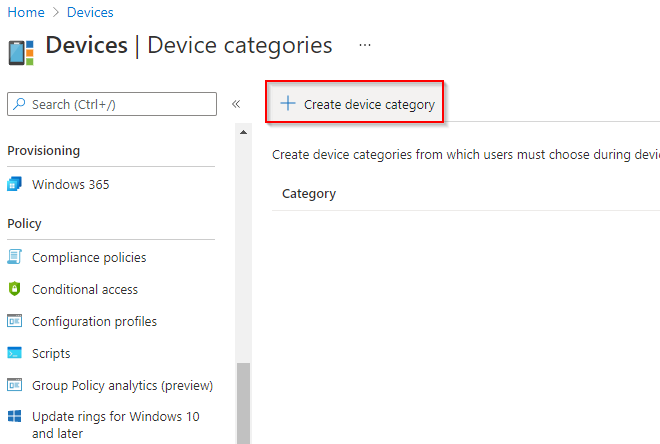
From the home dashboard, navigate to Devices > Device Categories.

Select the ‘Create Device Category’ button.
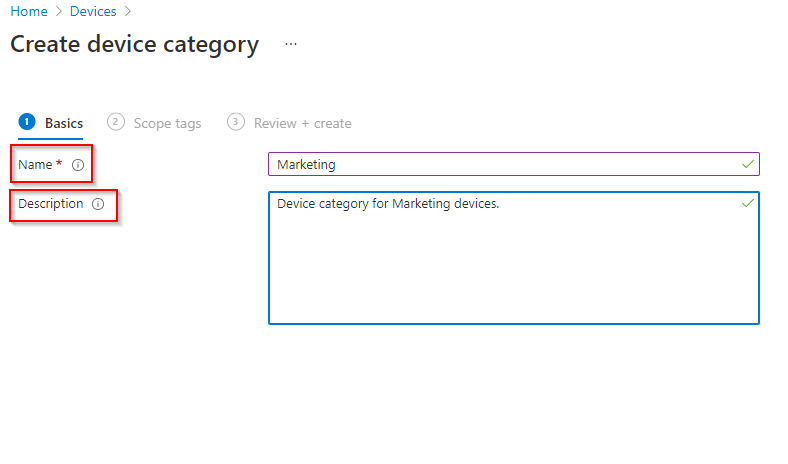
Set a Name and Description.
**Example**
Name: Marketing
Description: Device category for Marketing devices
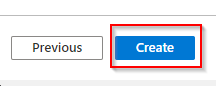
Select ‘Next’ and keep the default Scope Tag selected.

Select ‘Next’ and the ‘Create.
You will see Marketing device category appear in the list ready for use.

Create an Azure AD Dynamic Group
Sign in to your Azure portal by browsing to https://portal.azure.com
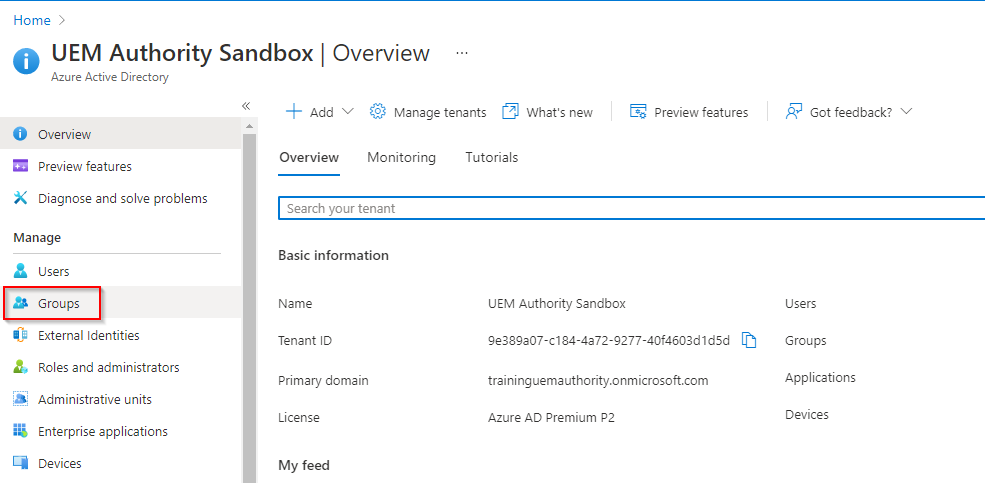
From the home dashboard, select ‘Azure Active Directory’.

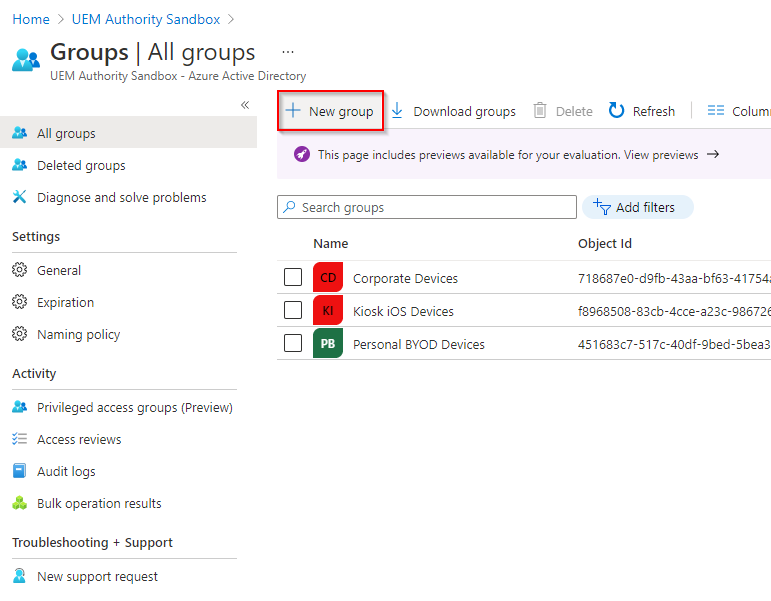
From the left side menu, select ‘Groups’.
Select the ‘New Group’ button.
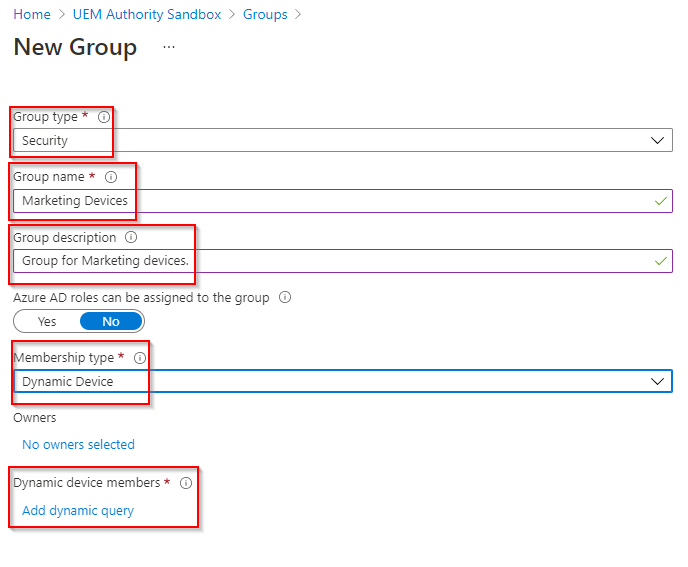
Complete the required information:
**Example**
Group Type: Security
Group Name: Marketing Devices
Group Description: Group for Marketing devices.
Azure AD roles can be assigned to the group: No
Membership Type: Dynamic Device
Owners: No
Select ‘Add Dynamic Query’
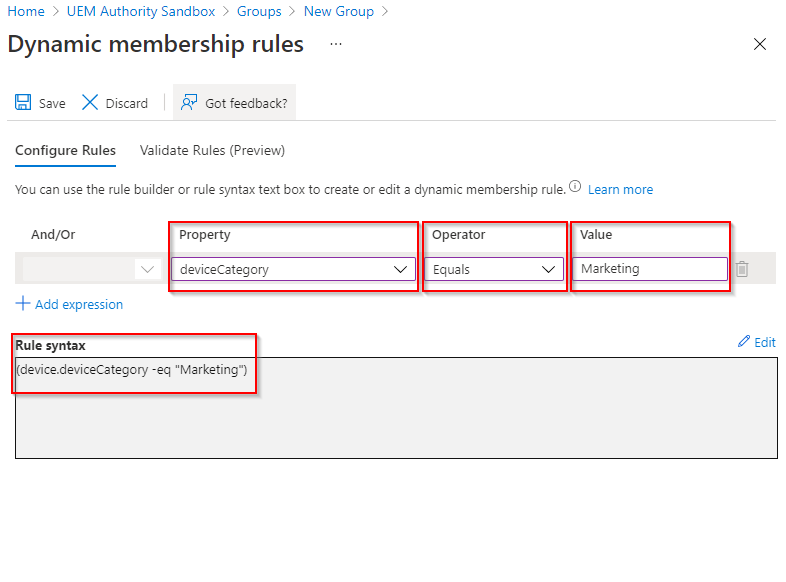
Within the query builder, we configure the query values as below:
Property: deviceCategory
Operator: Equals
Value: Marketing (Friendly name given to your device category in Endpoint Manager)
Clicking away from the query builder, we can see Azure AD automatically translates your configuration values into a Rule Syntax.
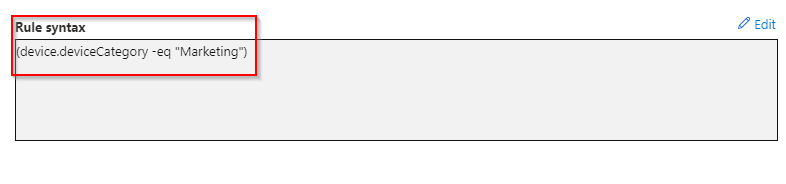
The Rule Syntax should look identical to this: (exception of the value between quotation marks is unique to your device category friendly name)
(device.deviceCategory -eq “Your_Device_Category_Name”)
Select the ‘Save’ button to save the dynamic query.

Select the ‘Create’ button to build the Azure AD dynamic group.
Once created, you will see Marketing Devices Azure AD dynamic group appear in the list ready for use.

See in Action
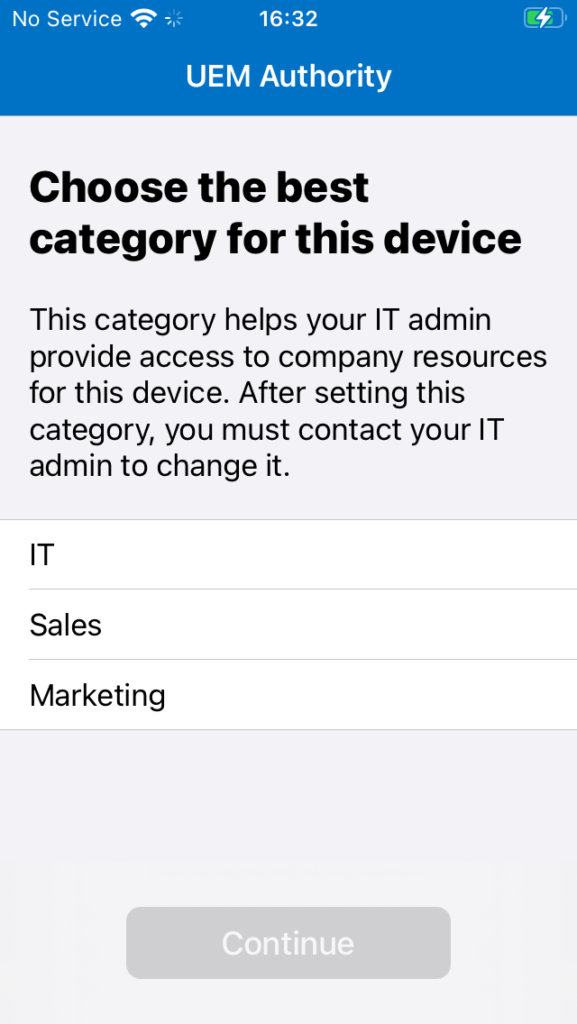
During enrolment to Endpoint Manager, Company Portal app will request the user select a device category from the list provided.
In this example, the Marketing device category is selected in order to demonstrate an Azure AD dynamic group at work.

Once enrolment has been completed, the Azure AD dynamic group triggers an evaluation of the tenant against criteria set in the dynamic rule syntax. If the evaluation finds a device matching the criteria, that device is automatically added as a member of the group.
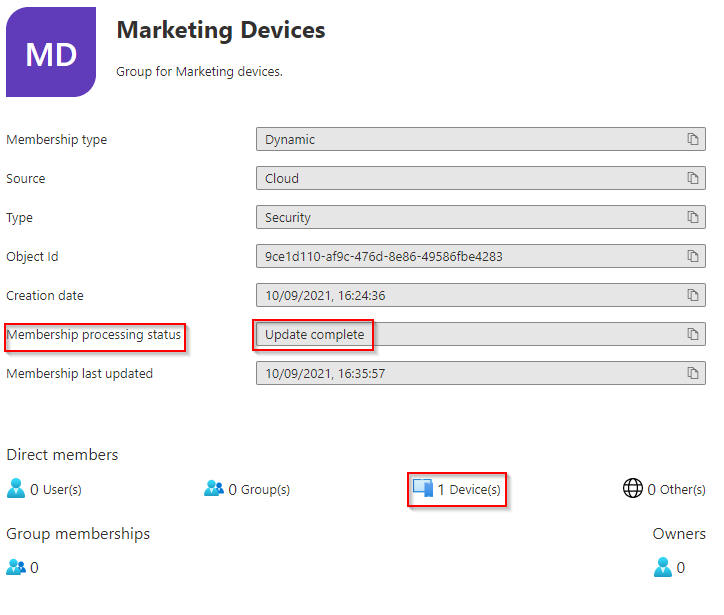
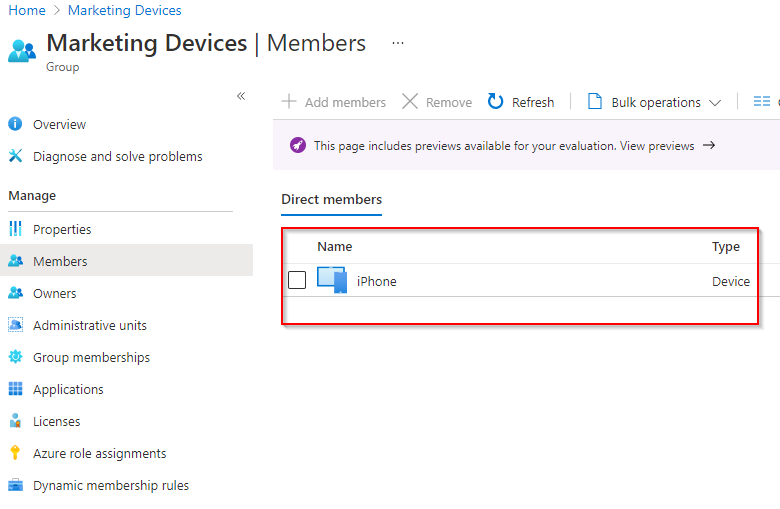
We can see our iPhone is now a member of the Marketing Devices group.
Episode 6 – iOS Compliance Policy, iOS Configuration Profile & Email Profile
Create an iOS Compliance Policy
Sign in to your Endpoint Manager portal by browsing to https://endpoint.microsoft.com
From the home dashboard, navigate to Devices > Compliance Policies.

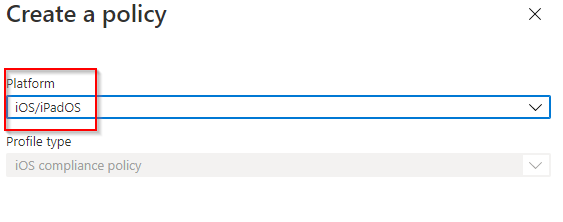
Select the ‘Create Policy’ button.

Select ‘iOS/iPadOS’ as the platform and then select ‘Create’.
Set a Name and Description.
**Example**
Name: iOS – Compliance Policy
Description: Compliance policy for iOS devices.

Select ‘Next’
For the purposes of this training course, the following example baseline compliance settings will be set:
**Example**
Email
- Unable to set up email on the device: Require
Device Health
- Jailbroken devices: Block
- Require the device to be at or under the Device Threat Level: Not Configured
Device Properties
- Minimum OS version: 13.0
- Microsoft Defender for Endpoint: Not Configured
System Security
- Require a password to unlock mobile devices: Require
- Simple passwords: Block
Minimum password length: 6
- Required password type: Numeric
- Number of non-alphanumeric characters in password: 1
- Maximum minutes after screen lock before the password is required: Immediately
- Maximum minutes of inactivity until screen locks: 5 minutes


Select ‘Next’.
Actions for noncompliance will remain unchanged.

Select ‘Next’.
Under Assignments, select ‘Add Groups’.

In this example, the ‘Corporate Devices’ group will be selected.
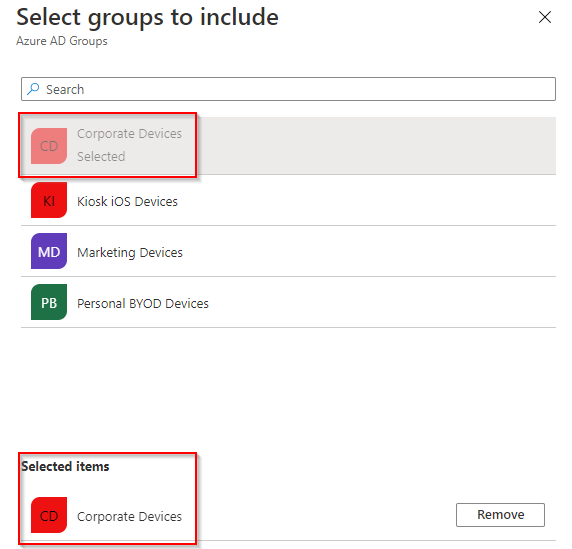
Select ‘Select’ to add your Azure AD Group.
Select ‘Next’ and then ‘Create’.
Once created, you will see the compliance policy appear in the list ready for use.
 See in Action
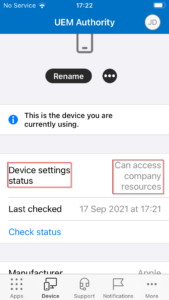
Device compliance status can be validated on the device by the user. Observing our enrolled device with Company Portal app, we can see the status says “Can access company resources”.
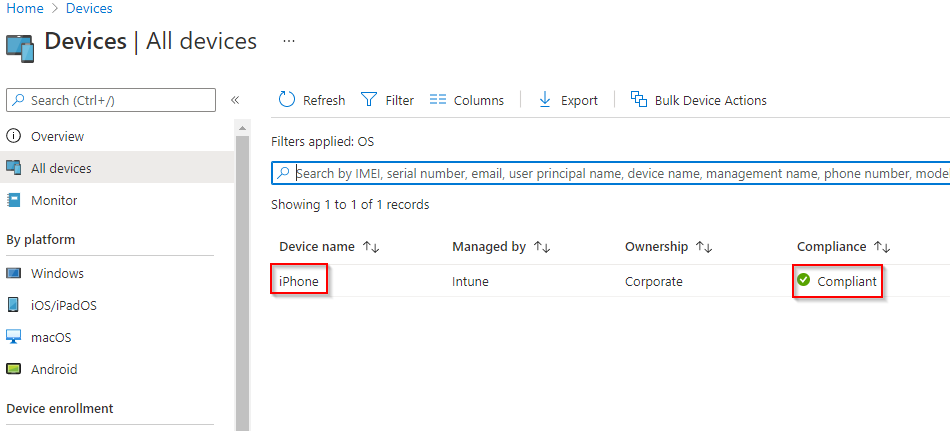
Within the Endpoint Manager portal, we can validate the compliance status of a device by navigating to Devices > All Devices.
Observing the device in question, we can see the compliance column indicates the device is compliant.
Selecting the device entry, under Device Compliance on the left side menu, we can see the compliance policy we created successfully assessed the device.

Create an iOS Configuration Profile
From the home dashboard, navigate to Devices > Configuration Profiles.
Select the ‘Create Profile’ button.

Select ‘iOS/iPadOS’ as the platform.
Select ‘Device Restrictions’ as the Profile Type and then select ‘Create’.

Set a Name and Description.
**Example**
Name: iOS – Device Restrictions Profile
Description: Device Restrictions profile for iOS devices.

Select ‘Next’
For the purposes of this training course, the following example baseline configuration profile settings will be tailored to an Unsupervised device:
**Example**
App Store, Doc Viewing, Gaming
- Treat AirDrop as an unmanaged destination: Yes
Cloud and Storage
- Force encrypted backup: Yes
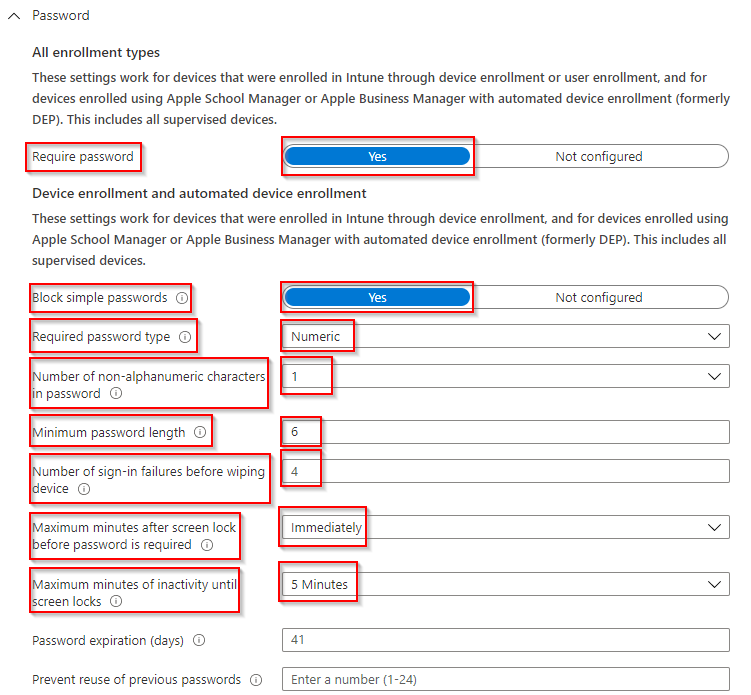
Password
- Require password: Yes
- Block simple passwords: Yes
- Required password type: Numeric
- Number of non-alphanumeric characters in password: 1
- Minimum password length: 6
- Maximum minutes after screen lock before the password is required: Immediately
- Maximum minutes of inactivity until screen locks: 5 minutes
Show or Hide Apps
- Type of apps list: Hidden apps
- Apps list: (Microsoft kindly provide a list of known Apple native app bundle ID’s)
- App bundle ID: com.apple.gamecenter
- App Name: Game Center
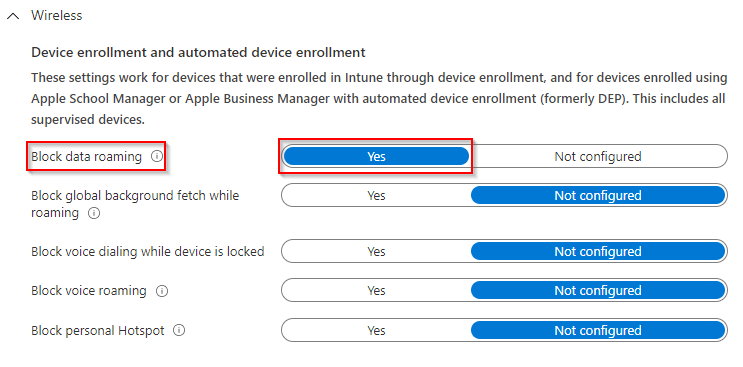
Wireless
- Block data roaming: Yes


Select ‘Next’.
Under Assignments, select ‘Add Groups’.

In this example, the ‘Corporate Devices’ group will be selected.
Select ‘Select’ to add your Azure AD Group.
Select ‘Next’ and then ‘Create’.
Once created, you will see the configuration profile appear in the list ready for use.
 See in Action
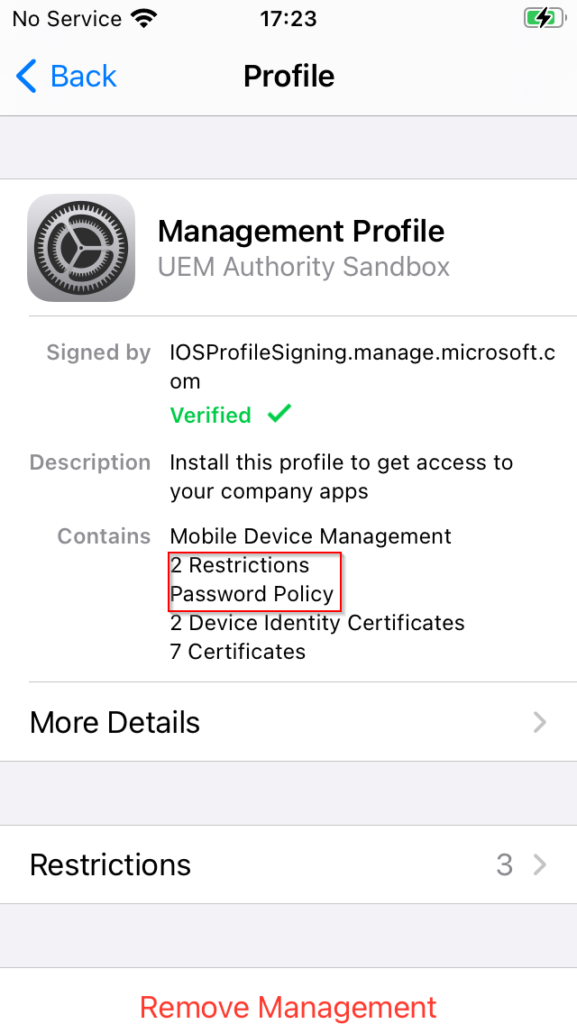
Installed configuration can be validated on the device by the user. Observing our enrolled device with the setting app, under General > Device Management > Management Profile, we can see “2 Restrictions” and “Password Policy” listed in the Contains list.
Selecting Restrictions, we can further validate device restriction settings match the Endpoint Manager deployed configuration profile we created.
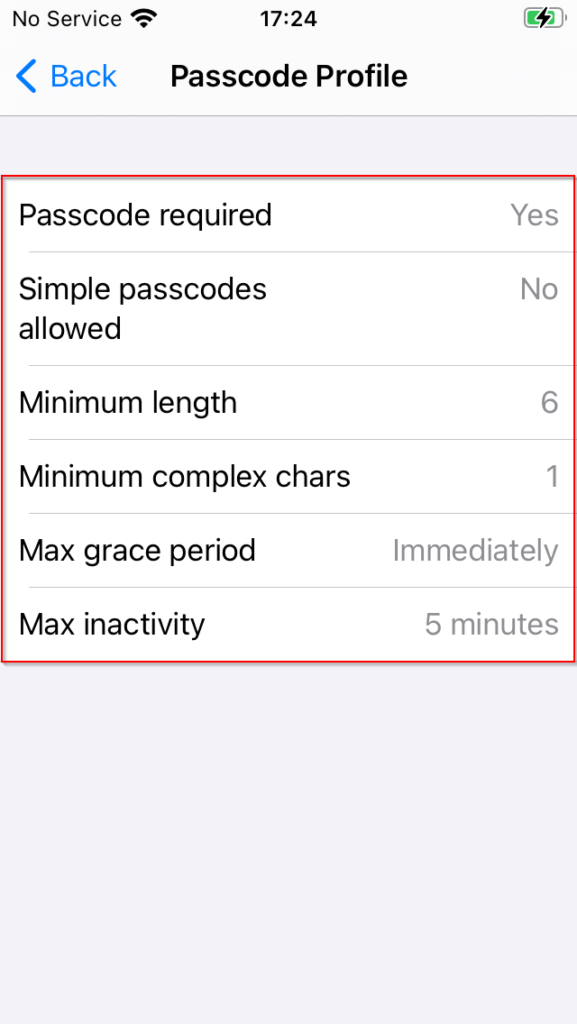
Drilling down into more detail by selecting the password policy, again, we can validate the password policy being enforced on the device matches the Endpoint Manager deployed configuration profile.

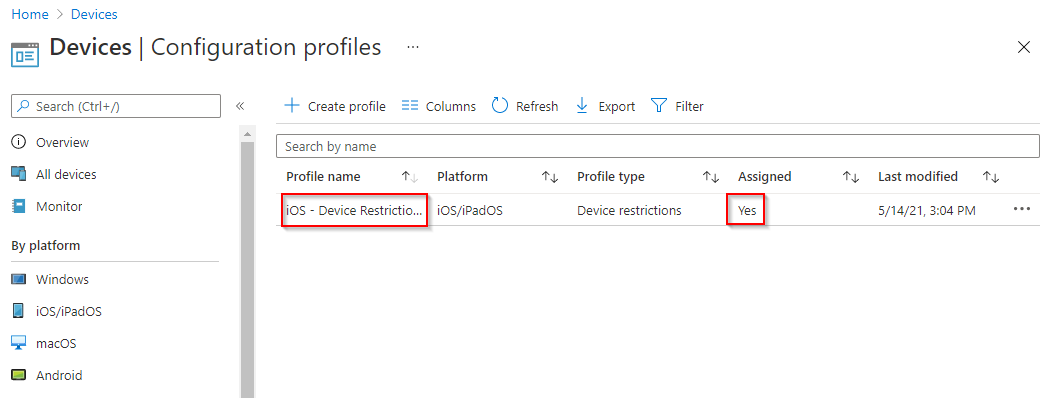
Within the Endpoint Manager portal, we can validate the configuration profile has been successfully installed on the device by navigating to Devices > All Devices.
Selecting the device entry, under Device Configuration on the left side menu, we can see the configuration profile we created successfully installed.

Create an iOS Email Profile
From the home dashboard, navigate to Devices > Configuration Profiles.
Select the ‘Create Profile’ button.
Select ‘iOS/iPadOS’ as the platform.
Select ‘Email’ as the Profile Type and then select ‘Create’.

Set a Name and Description.
**Example**
Name: iOS – Email Profile
Description: Email profile for iOS devices.

Select ‘Next’
For the purposes of this training course, the following example email profile settings will be set:
**Example**
Exchange ActiveSync account settings
- Email server: outlook.office365.com
- Account name: Work Email
- Username attribute from AAD: User Principal Name
- Email address attribute from AAD: Primary SMTP Address
- Authentication method: Username and password
- SSL: Enable
Exchange ActiveSync profile configuration
- Exchange data to sync: All data

Select ‘Next’.
Under Assignments, select ‘Add Groups’.

In this example, the ‘Corporate Devices’ group will be selected.
Select ‘Select’ to add your Azure AD Group.
Select ‘Next’ and then ‘Create’.
Once created, you will see the email profile appear in the list ready for use.

See in Action
Once the email profile has been successfully installed, the device will automatically prompt the user to complete Exchange ActiveSync authentication by asking for a password.
After authentication is complete, within the settings app under Mail > Accounts, we can see our account listed. Drilling down further into detail by selecting the email profile, we can validate the details match the Endpoint Manager deployed email profile.
Moving over to the native mail app, a test email has been received successfully.


Within the Endpoint Manager portal, we can validate the email profile has been successfully installed on the device by navigating to Devices > All Devices.
Selecting the device entry, under Device Configuration on the left side menu, we can see the email profile we created successfully installed.

Episode 7 – Applications, App Configuration & App Protection (MAM)
Add Outlook for iOS
Sign in to your Endpoint Manager portal by browsing to https://endpoint.microsoft.com
From the home dashboard, navigate to Apps > iOS/iPadOS > iOS/iPadOS apps.

Select the ‘Add’ button.

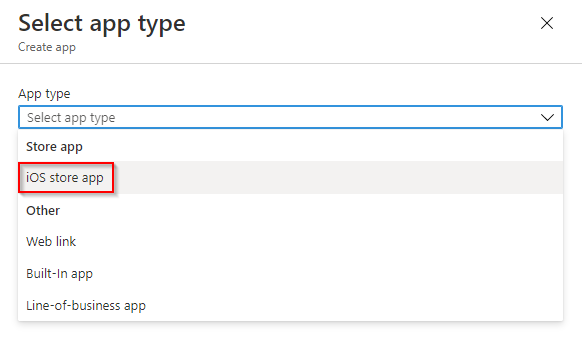
Select ‘iOS store app’ from the App Type drop-down and then press ‘Select’.
Select ‘Search the App Store’.

Ensure the correct locale is selected before search for an app. (United States is the default)
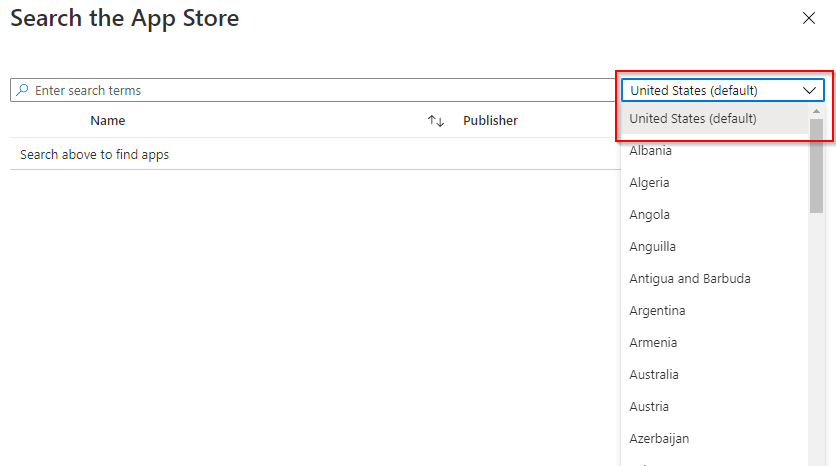
Enter Outlook into the search field.
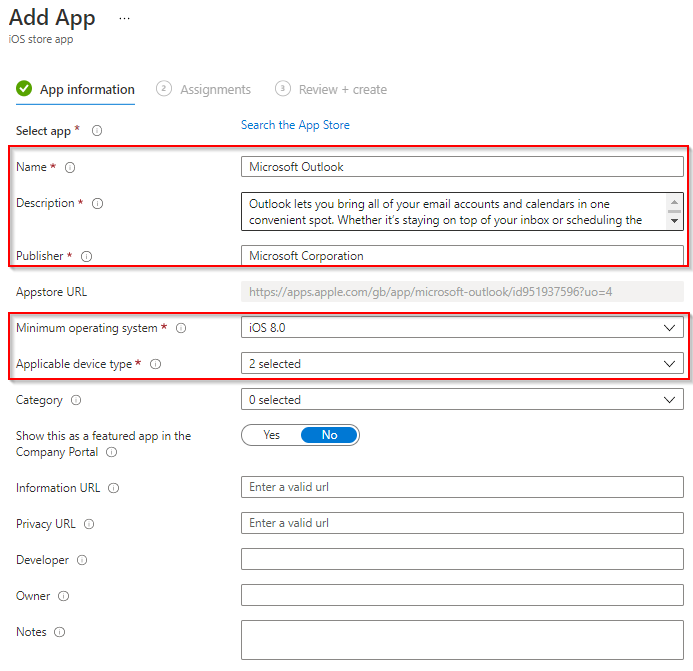
Select ‘Microsoft Outlook’ from the list and then press ‘Select’.

In the App Information section, observe that Endpoint Manager will conveniently pull all information about the app from the app store.
Select ‘Next’.
Choose the correct type of assignment relevant to your organisation requirements.
For the purpose of this training course, we assign Outlook as ‘Required’.
Select ‘Add Group’.
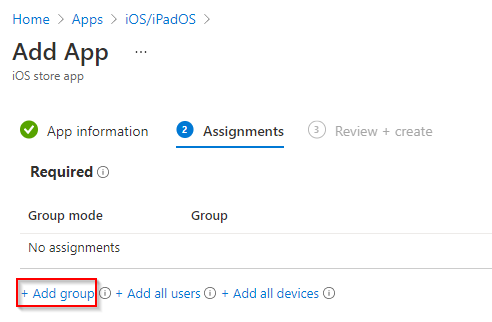
In this example, the ‘Corporate Devices’ group will be selected.
Select ‘Select’ to add your Azure AD Group.

Select ‘Next’ and then ‘Save’.
Once created, you will see Outlook app appear in the list ready for use.

See in Action
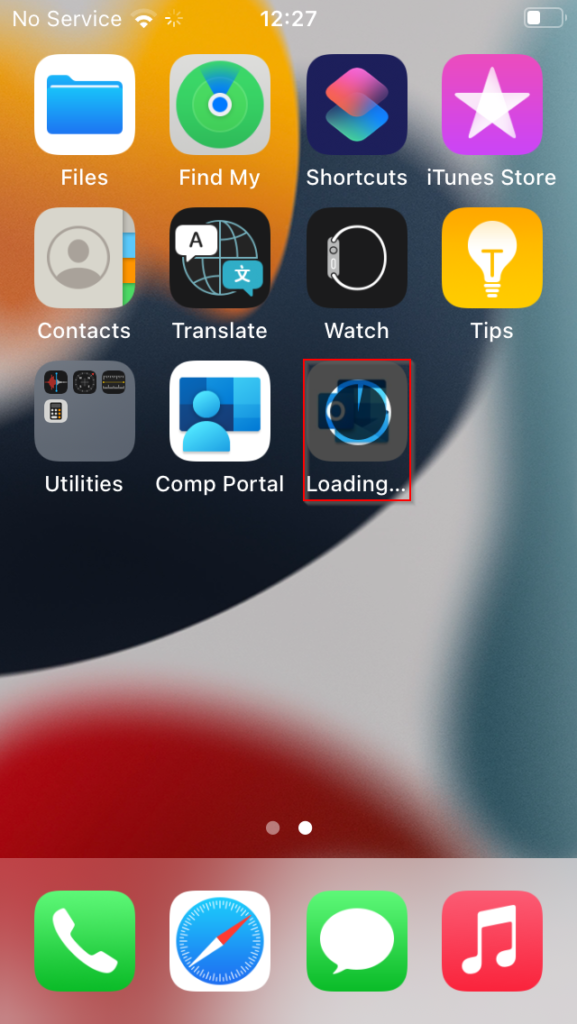
After assigning your chosen application as ‘Required’, Endpoint Manager will automatically prompt the user to install the application. Should the user select, ‘Cancel’, Endpoint Manager will prompt again upon the next scheduled device check-in.

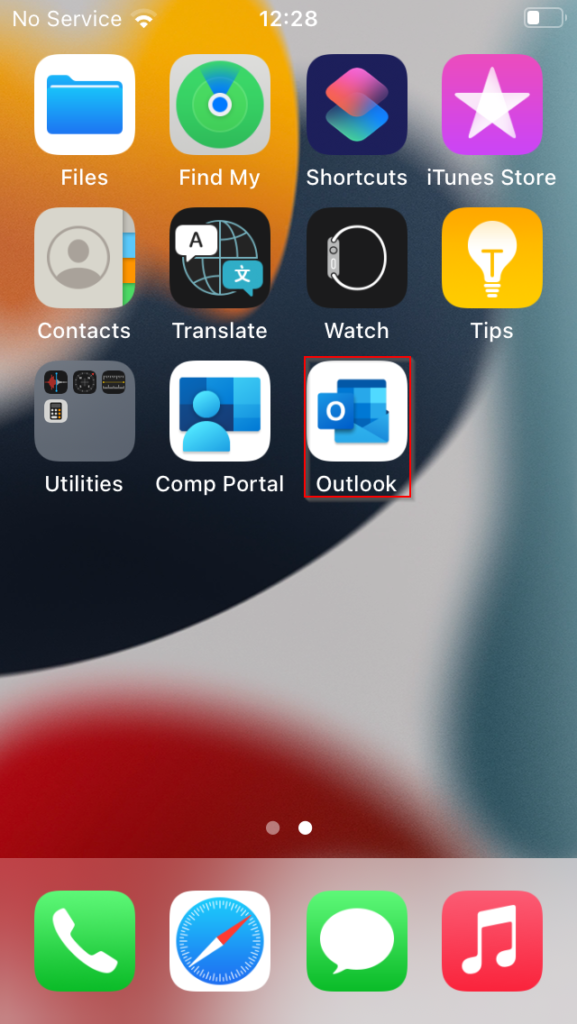
Within the Endpoint Manager portal, we can validate the email profile has been successfully installed on the device by navigating to Devices > All Devices.
Selecting the device entry, under Managed App on the left side menu, we can see the application successfully installed.

Add Outlook for Android
From the home dashboard, navigate to Apps > Android > Android apps.
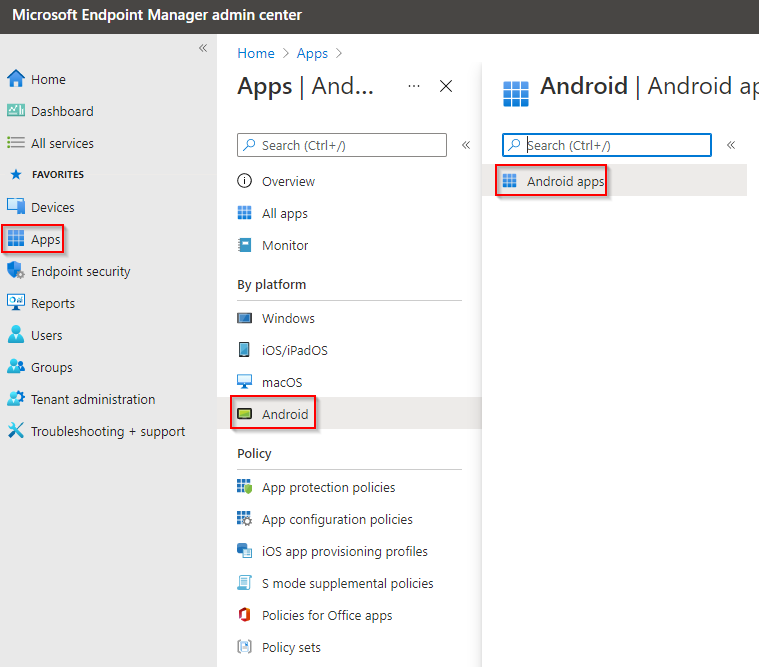
Select the ‘Add’ button.

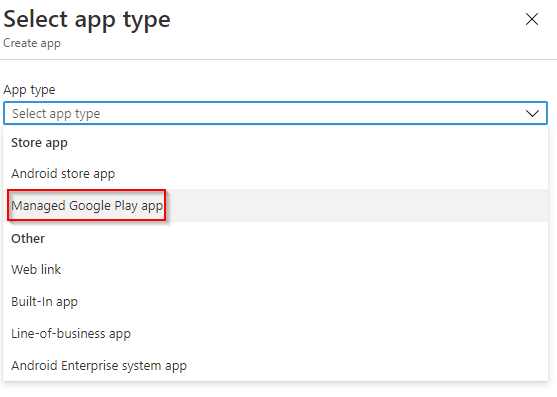
Select ‘Managed Google Play Store’ from the App Type drop-down and then press ‘Select’.
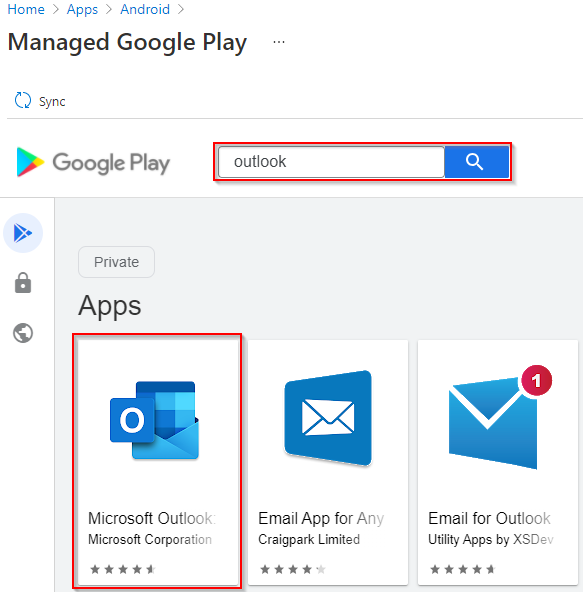
Managed Google Play Store will render within the Endpoint Manager console using an integrated API called iFrame.
Enter Outlook into the search field.
Select Outlook from the search results.
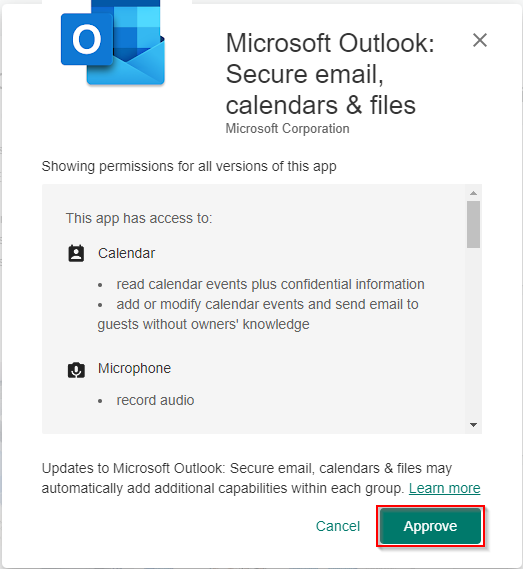
Select ‘Approve’.

Select ‘Approve’ and then select ‘Done’.

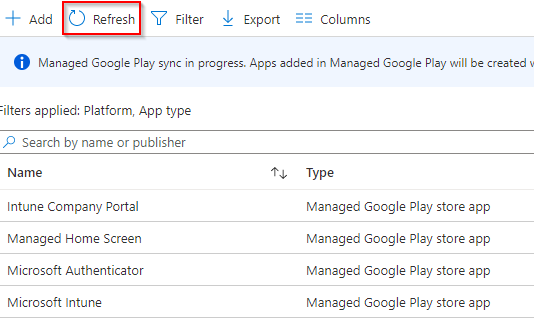
Invoke a manual synchronisation by selecting the ‘Sync’ button.

Allow up to 5 minutes whilst Managed Google Play syncs with Endpoint Manager.
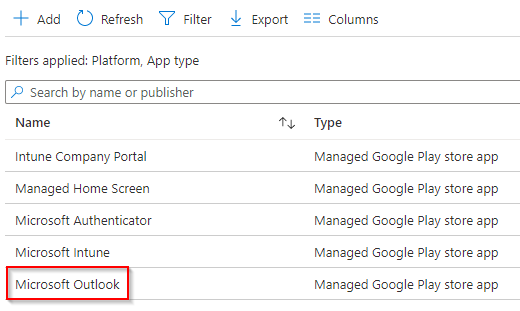
Select the ‘Refresh’ button in order to update the apps list.

Now select ‘Outlook’ from the list and then select ‘Properties’.
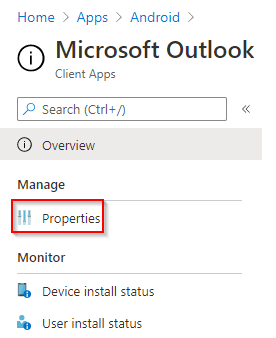
Under Assignments, select ‘Edit’.

Choose the correct type of assignment relevant to your organisation requirements.
For the purpose of this training course, we assign Outlook as ‘Required’.
Select ‘Add Group’.

In this example, the ‘Corporate Devices’ group will be selected.
Select ‘Select’ to add your Azure AD Group.
Select ‘Next’ and then ‘Save’.
See in Action
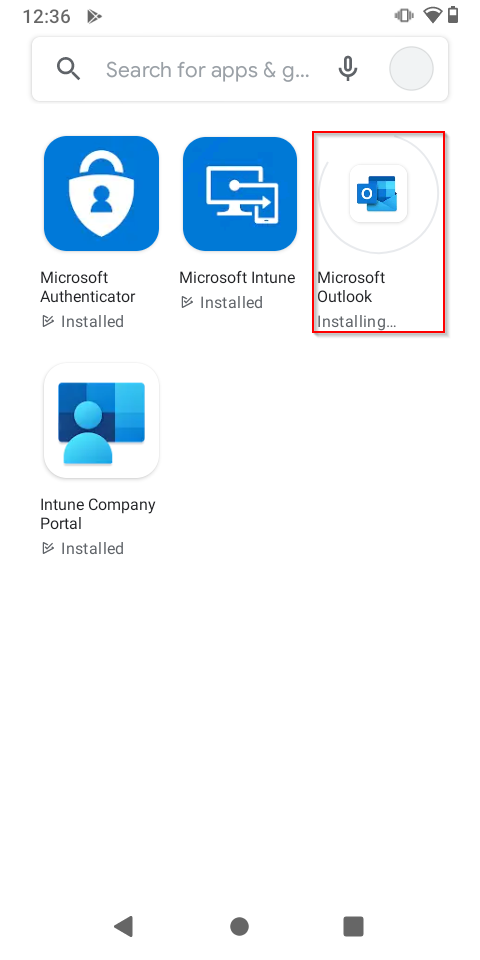
After assigning your chosen application as ‘Required’, Endpoint Manager will automatically install the application. Gesturing down from the top of the screen, Google Play Store displays a notification “Installing apps from your organisation”.
Pressing the notification, Google Play Store shows the chosen app being installed.


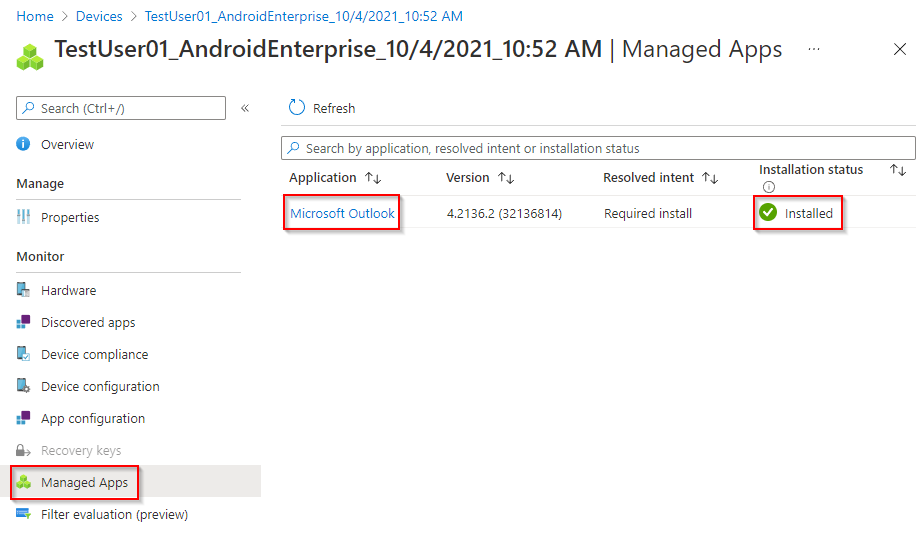
Within the Endpoint Manager portal, we can validate the email profile has been successfully installed on the device by navigating to Devices > All Devices.
Selecting the device entry, under Managed App on the left side menu, we can see the application successfully installed.
Create an App Configuration Policy
From the home dashboard, navigate to Apps > App Configuration Policies.

Select the ‘Add’ button and then select ‘Managed Devices’.

Set a Name and Description.
**Example**
Name: iOS – Outlook App Configuration Policy
Description: App Configuration policy for Outlook on iOS.
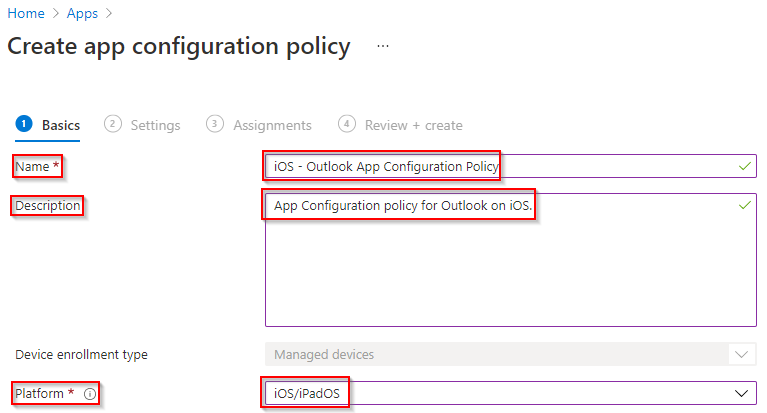
Select iOS/iPadOS from the Platform dropdown.
![]()
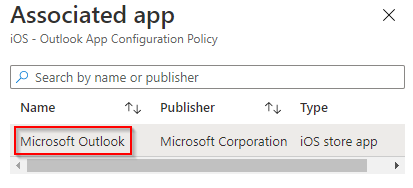
Press the ‘Select app’ button, select Outlook from the list and then press ‘Ok’.
Select ‘Next’.
Select ‘Use Configuration Designer’ from the Configuration Settings Format dropdown.

For the purposes of this training course, the following Outlook App Configuration settings will be set:
**Example**
Email Account Configuration
- Configure email account settings: Yes
- Authentication type: Basic authentication
- Username attribute from AAD: User Principal Name
- Email address attribute from AAD: Primary SMTP Address
- Email Server: outlook.office365.com
- Email Account Name: Corporate Email
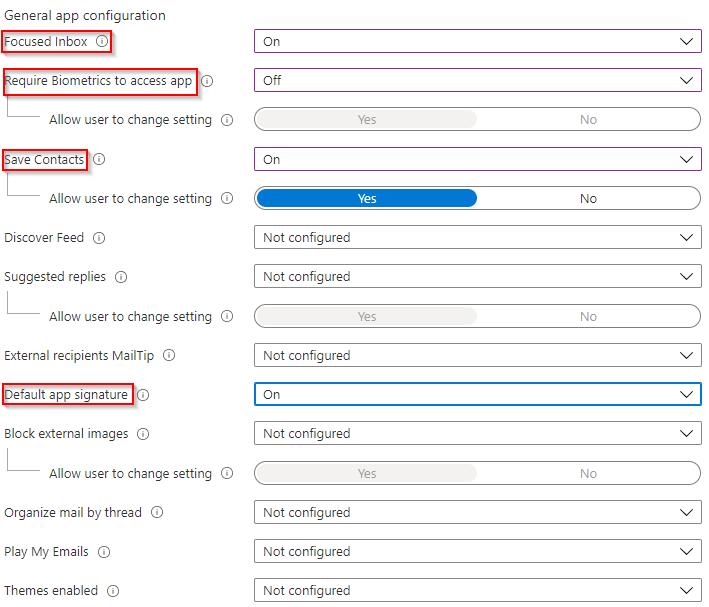
General App Configuration
- Focused Inbox: On
- Require Biometrics to access app: Off
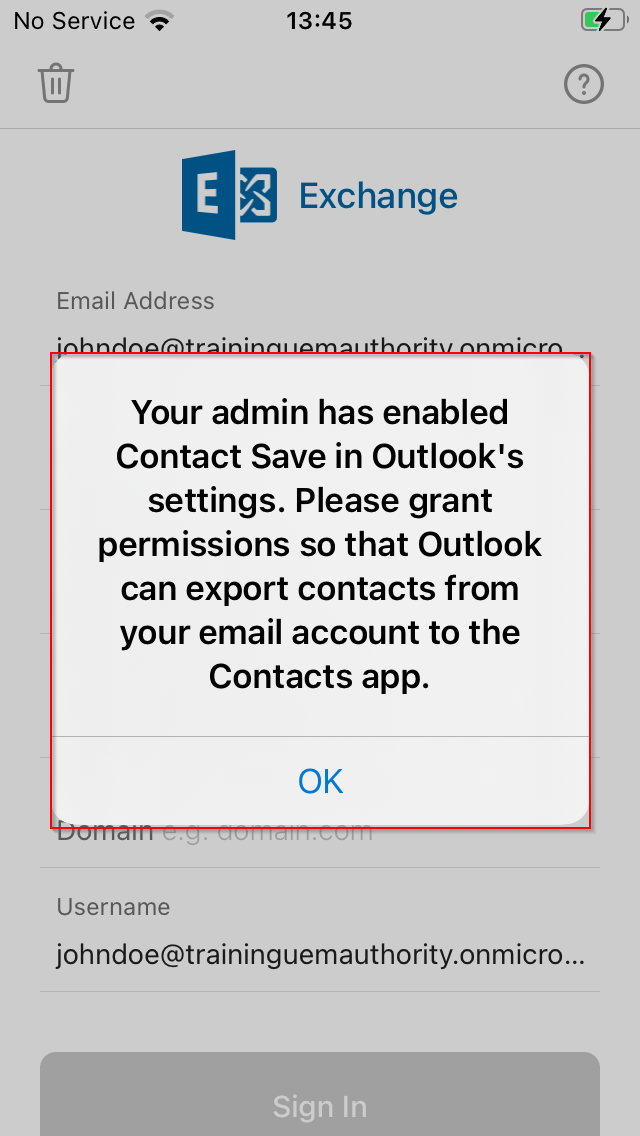
- Save Contacts: On
- Allow user to change settings: Yes
- Default app signature: On

 Select ‘Next’.
Under Assignments, select ‘Add Groups’.
In this example, the ‘Corporate Devices’ group will be selected.
Select ‘Select’ to add your Azure AD Group.
Select ‘Next’ and then ‘Create’.
Once created, you will see the App Configuration Policy appear in the list ready for use.

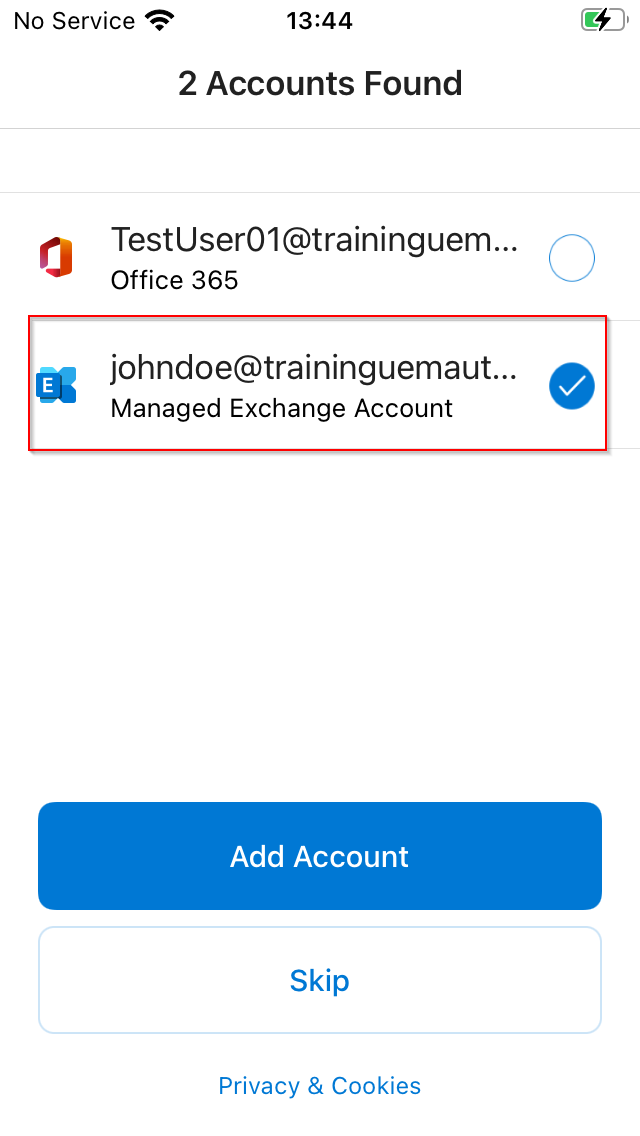
See in Action
App Configuration can be enabled and validated on the device by the user. Observing our enroled device in Outlook, we can see App Configuration has detected and pre-populated our enroled user account – johndoe@traininguemauthority.onmicrosoft.com
After selecting ‘Add Account’, we sign in to complete authentication.


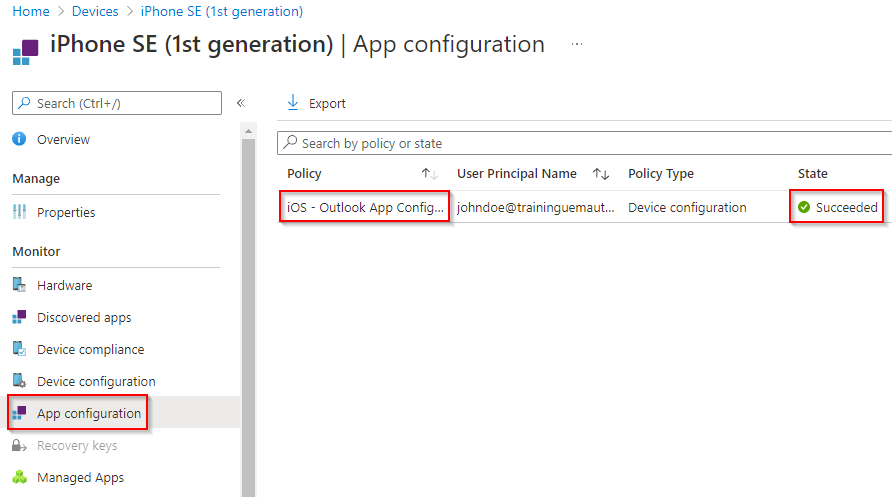
Within the Endpoint Manager portal, we can validate the App Configuration policy has been successfully installed on the device by navigating to Devices > All Devices.
Selecting the device entry, under App Configuration on the left side menu, we can see the App Configuration policy we created successfully installed.
Create an App Protection Policy
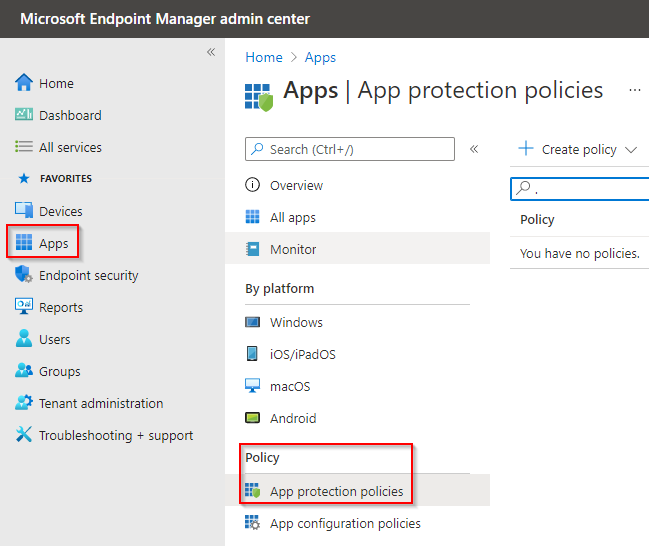
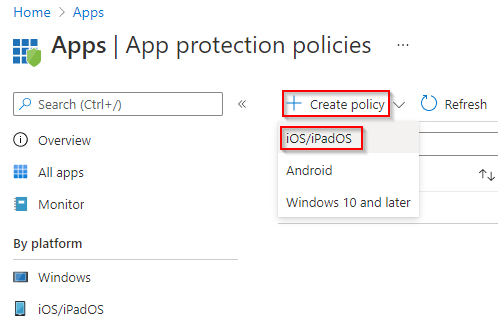
From the home dashboard, navigate to Apps > App Protection Policies.
Select the ‘Add’ button and then select ‘iOS/iPadOS’.
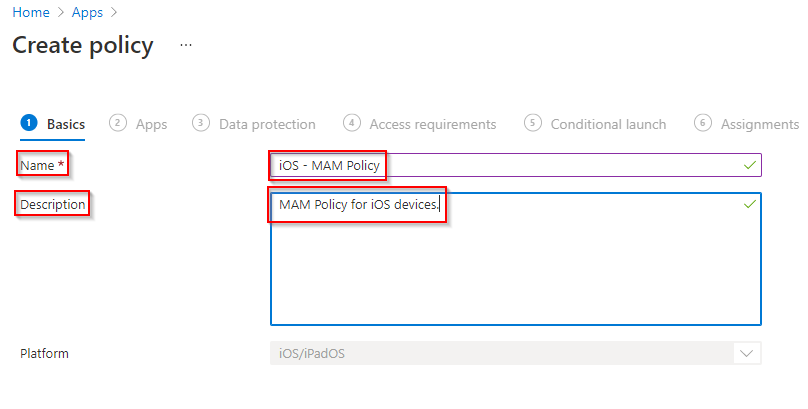
Set a Name and Description.
**Example**
Name: iOS – MAM Policy
Description: MAM Policy for iOS devices.
Select ‘Next’.
For the purposes of this training course, MAM will be targeted to both Managed and Unmanaged iOS devices.
The following App Protection settings will be set:
**Example**
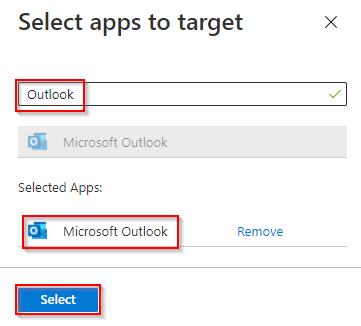
Target to apps on all device types: Yes

Press ‘Select Public Apps’ and then select Outlook from the list.

Select ‘Next’.
Data Transfer
- Backup org data to iTunes and iCloud backups: Block
- Send org data to other apps: Policy managed apps
- Select apps to exempt: Default
- Save copies of org data: Block
- Allow user to save copies to select services: OneDrive for Business & SharePoint
- Transfer telecommunication data to: Any dialer app
- Dialer App URL Scheme: None
- Receive data from other apps: Policy managed apps
- Open data into Org documents: Block
- Allow to user open data from select services: OneDrive for Business, SharePoint & Camera
- Restrict cut, copy, and paste between other apps: Policy managed apps
- Cut and copy character limit for any app: 0
- Third-party keyboards: Allow
Encryption
- Encrypt org data: Require
Functionality
- Sync policy managed app data with native apps: Allow
- Printing org data: Block
- Restrict web content transfer with other apps: Microsoft Edge
- Unmanaged browser protocol: None
- Org data notifications: Allow

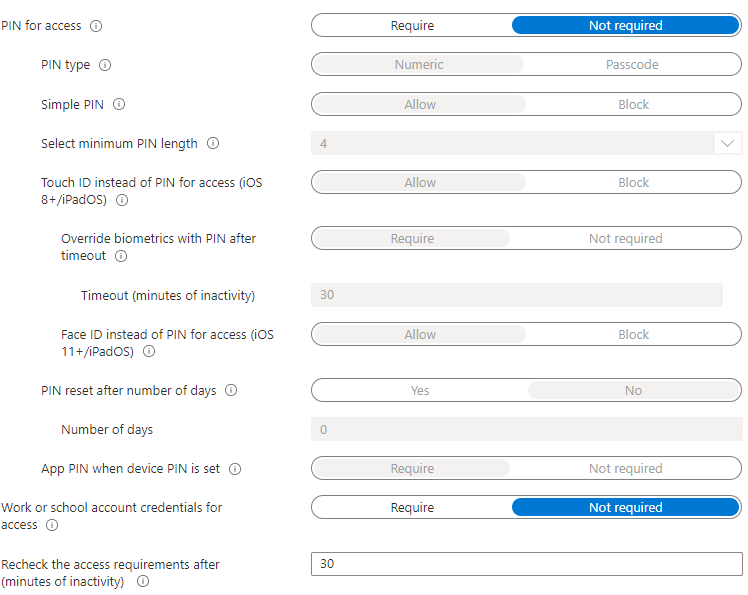
Access Requirements
- Pin for Acces: Not Required
- Work or school account credentials for access: Not Required
- Recheck the access requirements after (minutes of inactivity): 30
Conditional Launch
- Offline grace period: 720 – Block access (minutes)
- Offline grace period: 90 – Wipe data (days)
- Jailbroken/Rooted devices: Block access

Select ‘Next’.
Under Assignments, select ‘Add Groups’.
In this example, the ‘Corporate Devices’ group will be selected.
Select ‘Select’ to add your Azure AD Group.
Select ‘Next’ and then ‘Create’.
Once created, you will see the App Protection Policy appear in the list ready for use.

See in Action
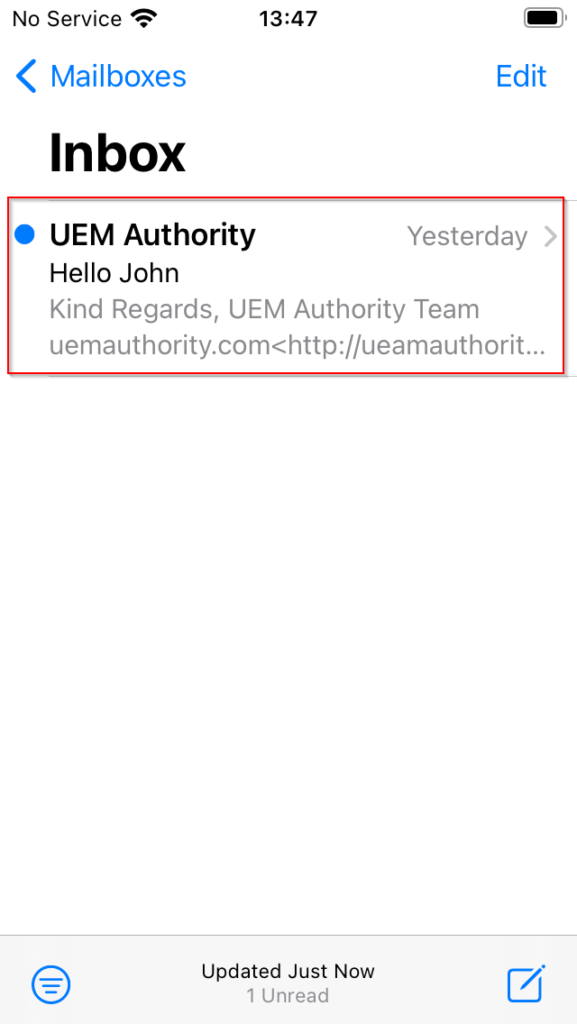
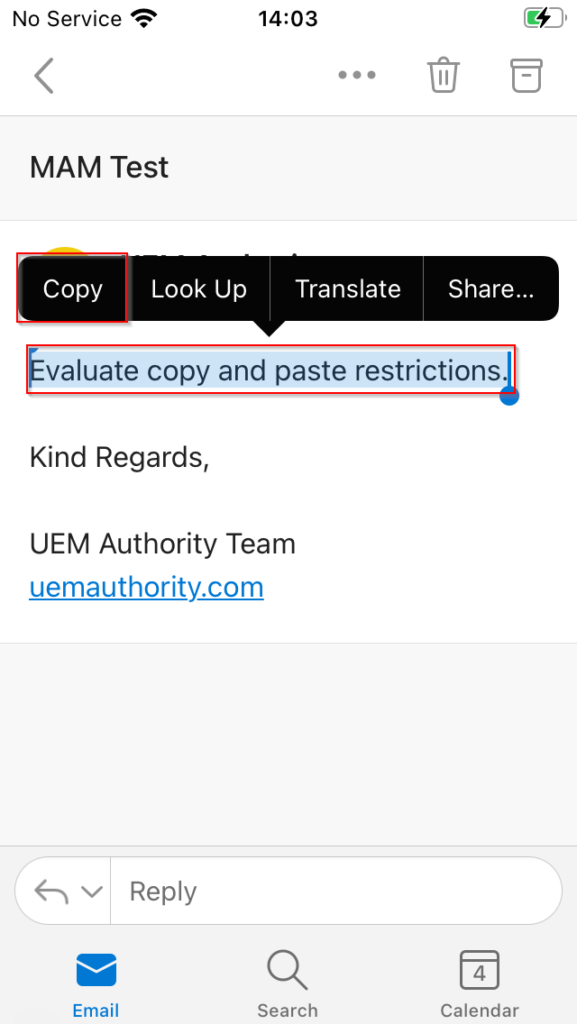
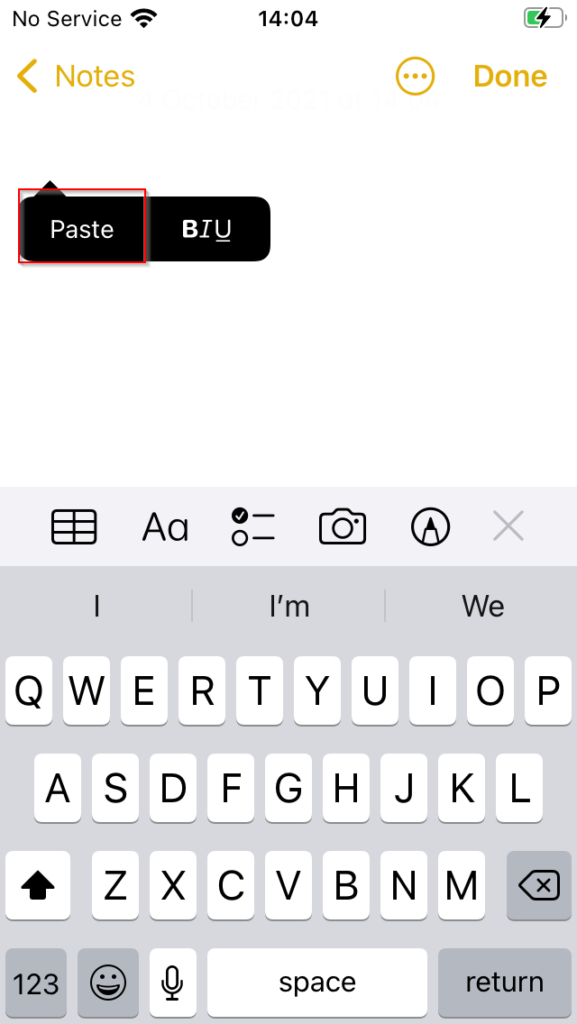
App Protection can be validated on the device by the user. Observing our enroled device in Outlook, we can test cut, copy and paste restrictions that are being enforced by our App Protection policy.
For the purposes of this demonstration, we have received an email from our fictional organisation that contains sensitive information. We will attempt to exfiltrate this information by means of Copy and Paste.
Copying text from the body of the email, we close Outlook and then open the native Notes app. Attempting to paste the copied information, App Protection replaces the original text in the clipboard cache with “Your orginastion’s data cannot be pasted here”.


Within the Endpoint Manager portal, we can validate which apps App Protection is applied to by app or user. Navigating to Apps > Monitor > App Protection Status > Reports.

Selecting the User Report, we choose the enroled user – johndoe@traininguemauthority.onmicrosoft.com.
The report shows iOS – MAM Policy is successfully applied against Microsoft Outlook.

Episode 8 – Enrol iOS & Android Devices
iOS Device Manual Enrolment
Android Device Manual Enrolment
Enable Android Enterprise Enrolment
To support Android Enterprise Corporate Owned Business Only enrolment to Endpoint Manager, the relevant enrolment profile must first be activated.
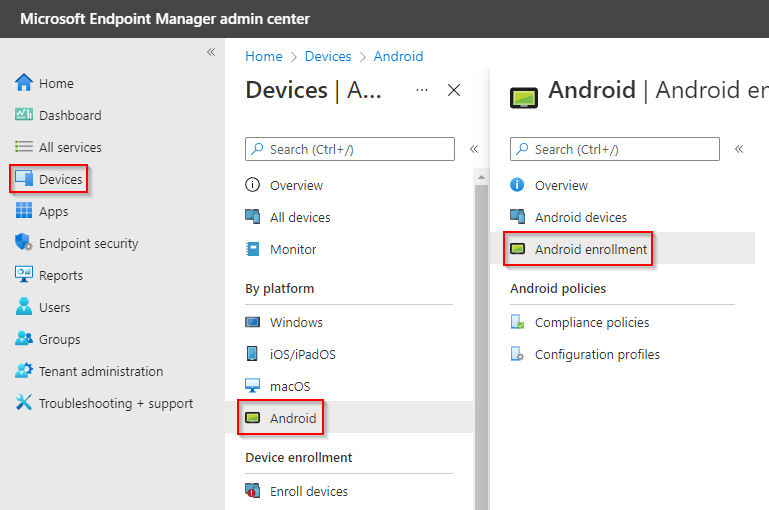
From the home dashboard, navigate to Devices > Android > Android Enrolment.
Under Enrolment Profiles, Select ‘Corporate-owned, fully managed user devices’.

Next to Allow user to enrol corporate-owned user devices, toggle to ‘Yes’.

Intune will generate a unique QR code and Token ID.

Once enrolment has been invoked using AFW#SETUP during Out of Box setup wizard, the Token ID must be inputted when prompted.