The information on this course is provided ‘AS IS’ with no warranties and confers no rights. This course does not represent the views of my employer. All content on this site is solely my own personal views and recommendations.
Introduction
Guide
Episode 1 – Licensing, Users & MDM Authority
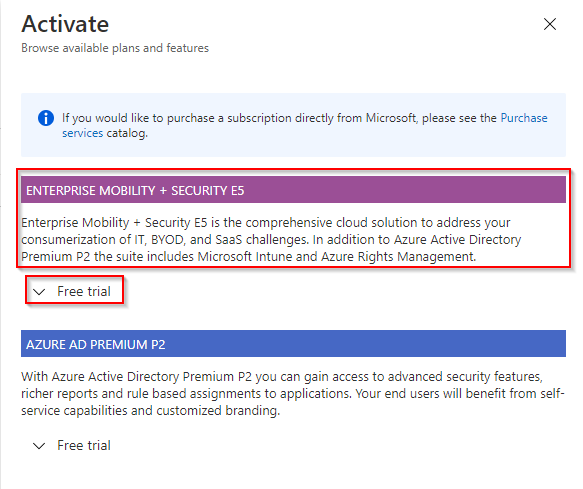
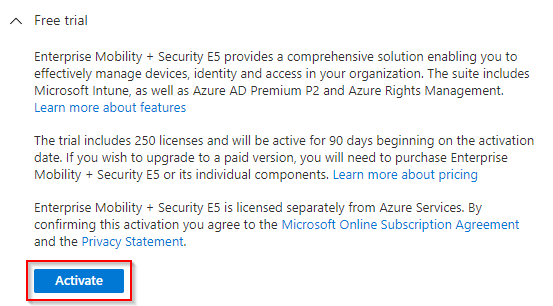
Activate a trial Enterprise Mobility & Security license
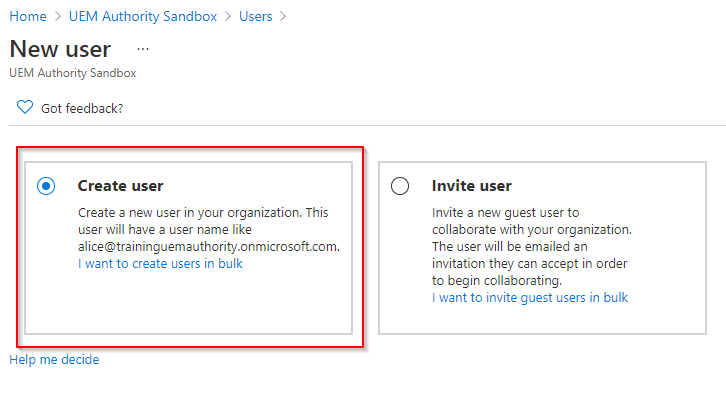
Create a Cloud Azure AD user
We shall create an Azure AD user for enrolment testing purposes only. This account will not be granted administrator access to the Azure portal.
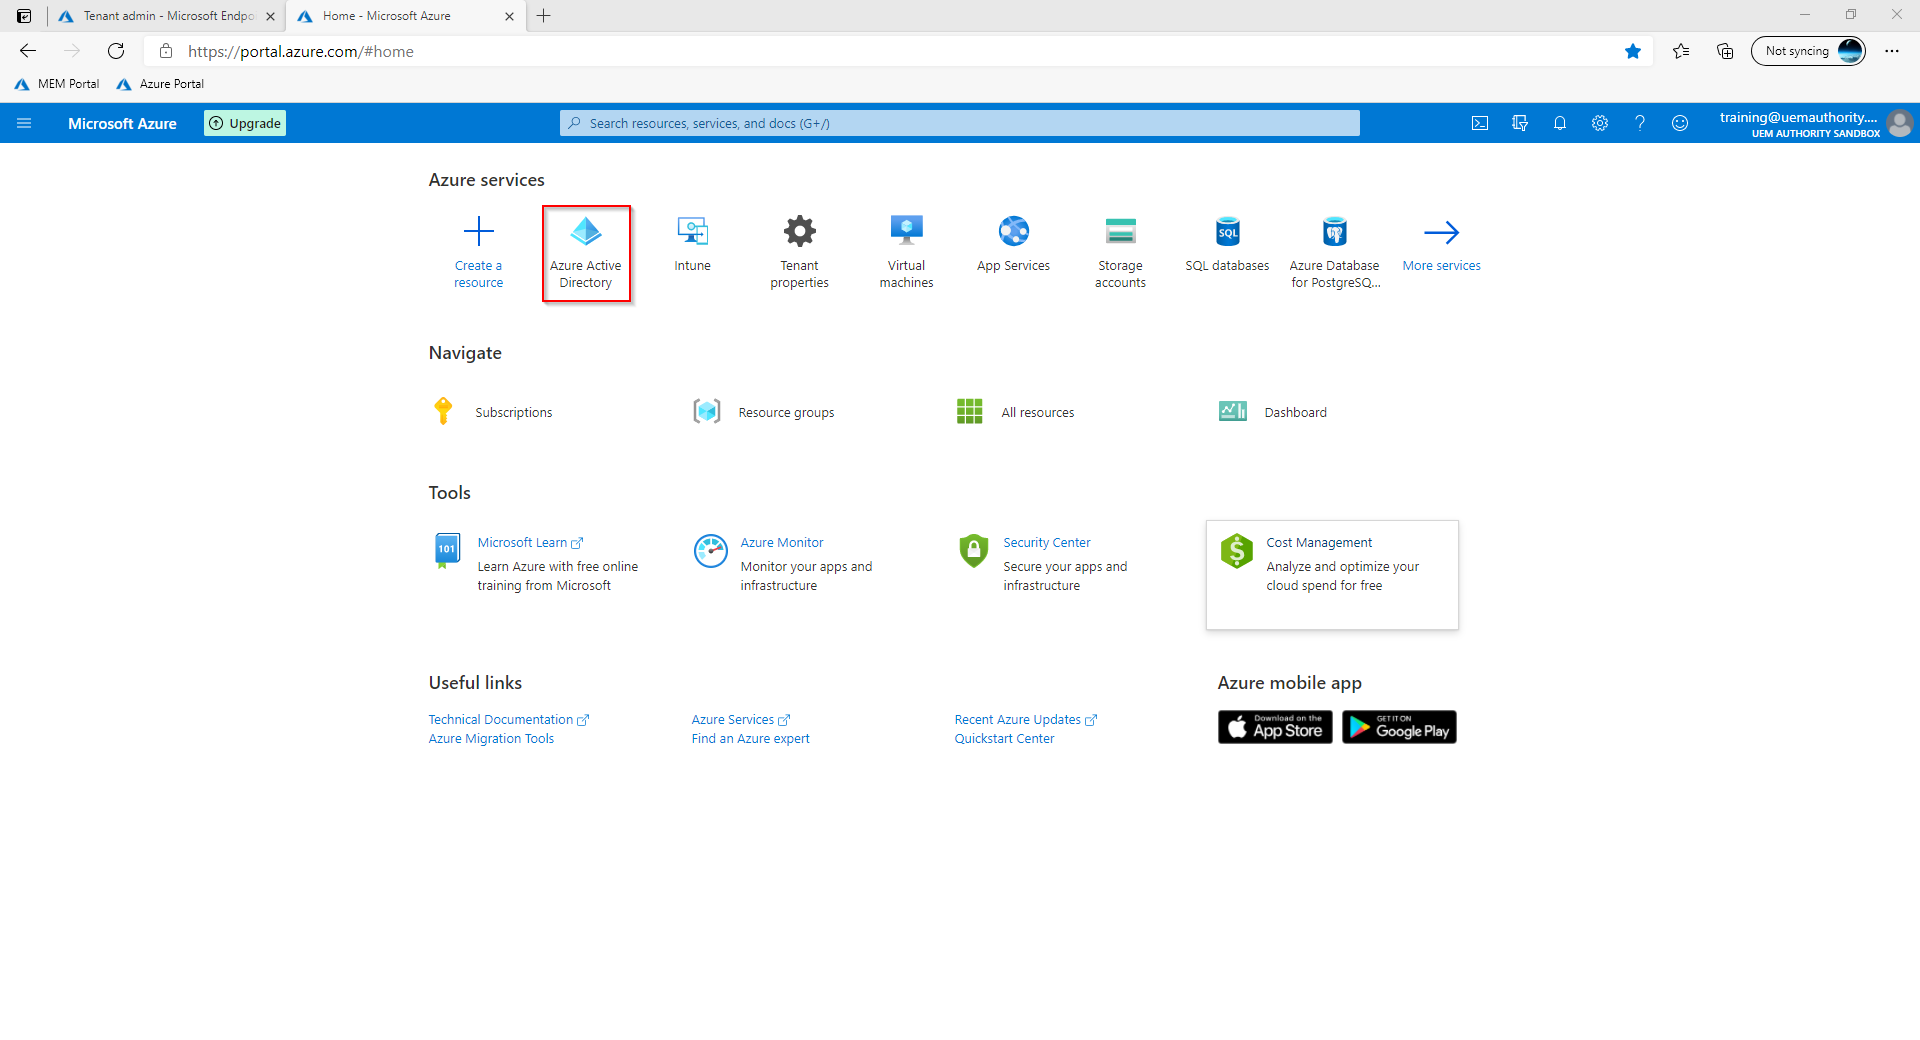
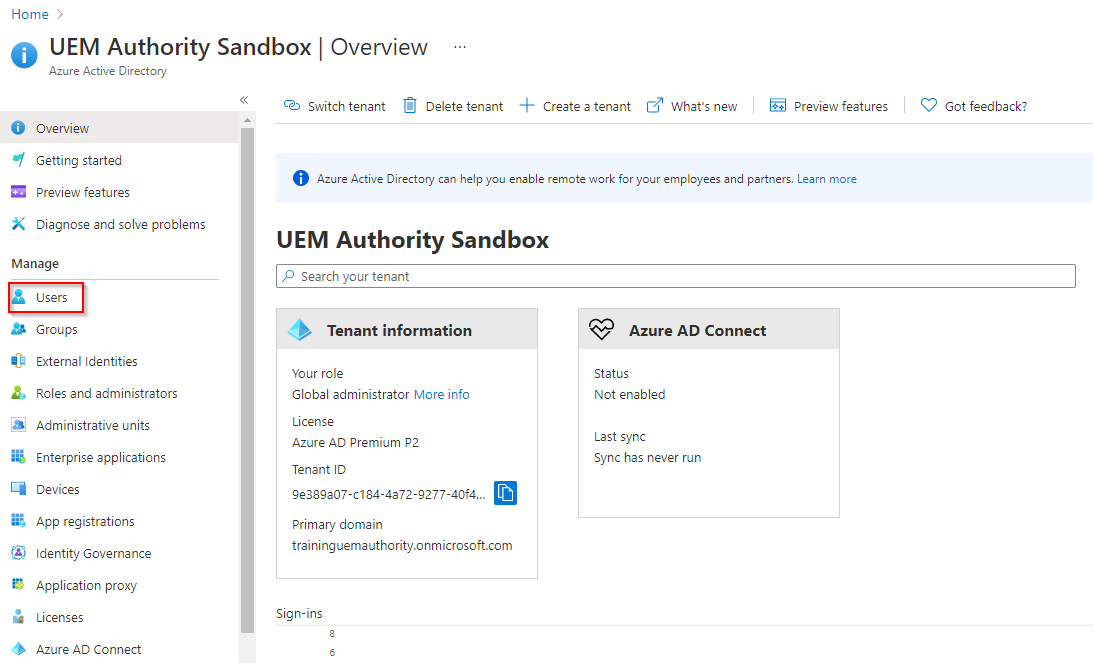
From the home dashboard, select ‘Azure Active Directory’.
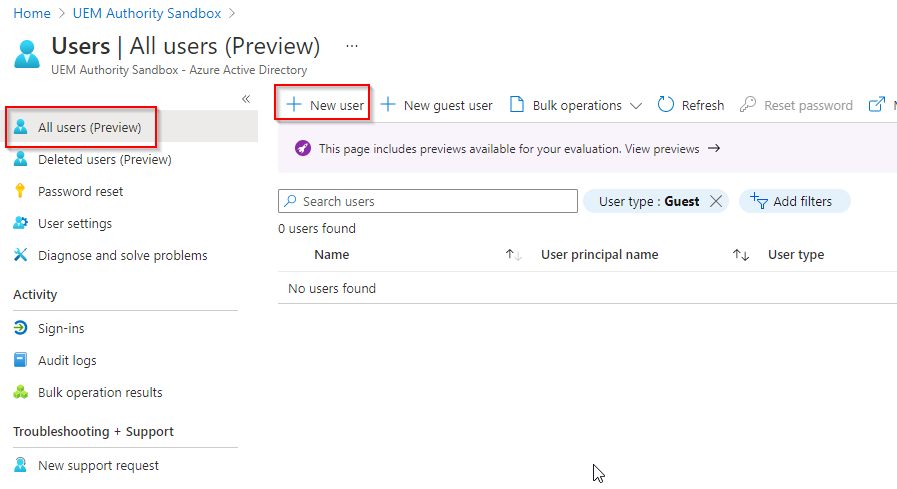
From the left menu, select Users.
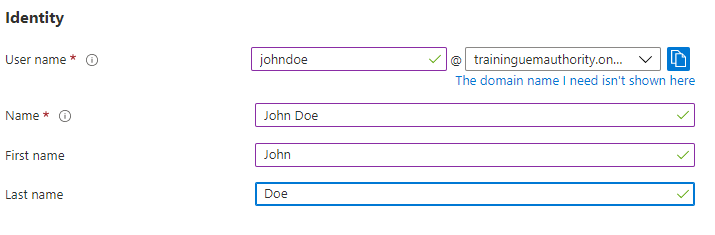
Under Identity, complete the required information:
**Example**
Username: johndoe@johndoe.onmicrosoft.com or a custom domain
Name: John Doe
First Name: John
Last Name: Doe
 Under Password, you are offered the choice to have Azure AD generate a password for you or allow you to set a custom password.
For the purpose of this guide, we will select Auto-generate.
Select the ‘Show Password’ toggle to reveal the password.

Under Settings:
Block Sign In: No
Usage Location: Your locale-specific location

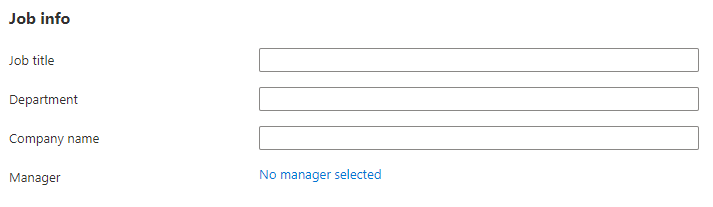
Under Job Info, we have the option to set specific information about the Azure AD account owner. We will skip past this section, however, feel free to experiment here.
Select the ‘Create’ button to finish.
You will see the newly created account populate in the All Users pane.
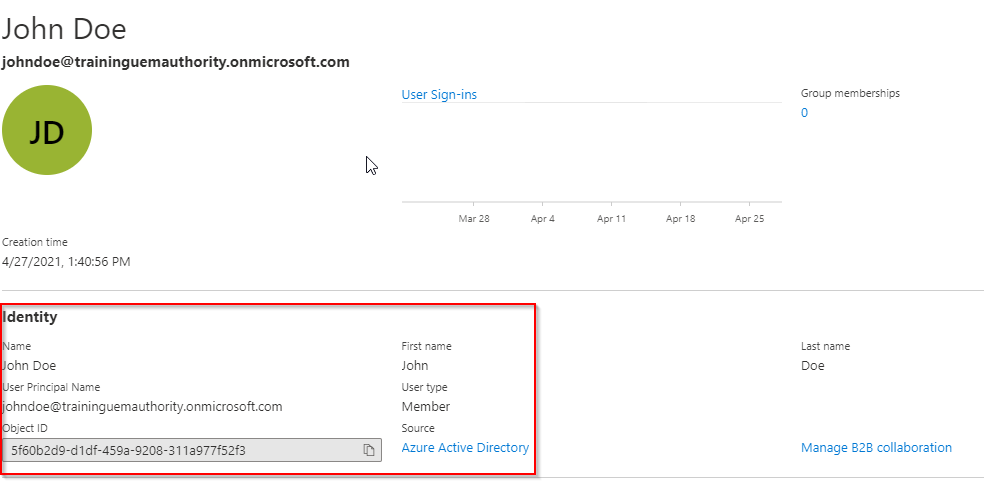
Select the user account to review its details.

Things to note:
User Principal Name (UPN) should match the information provided during account creation.
User Type is set as Member, and not Guest, because the account is part of your organisation.
Object ID is a unique static attribute number assigned to this account.
Source is set as Azure Active Directory because this account originated in and resides in Azure Active Directory and not On-Premise Active Directory.
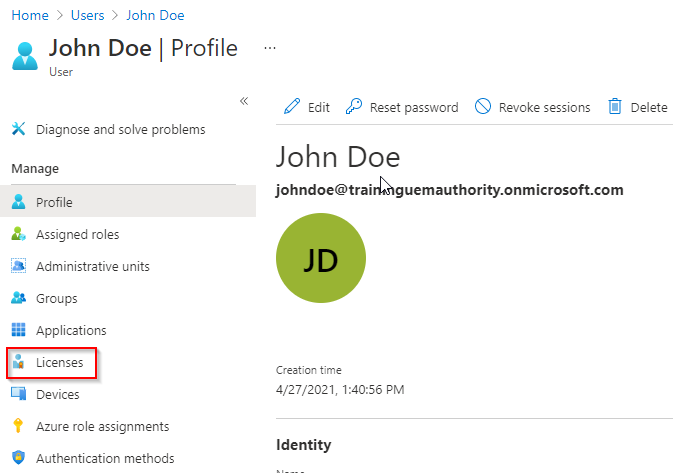
Assign a license to an Azure AD user account
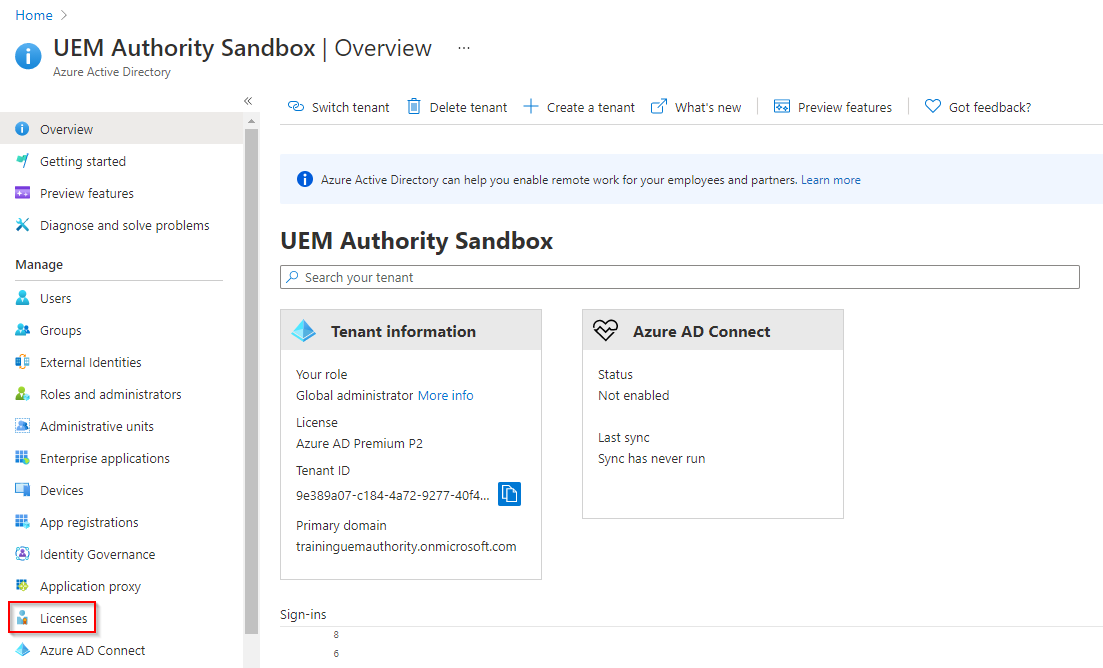
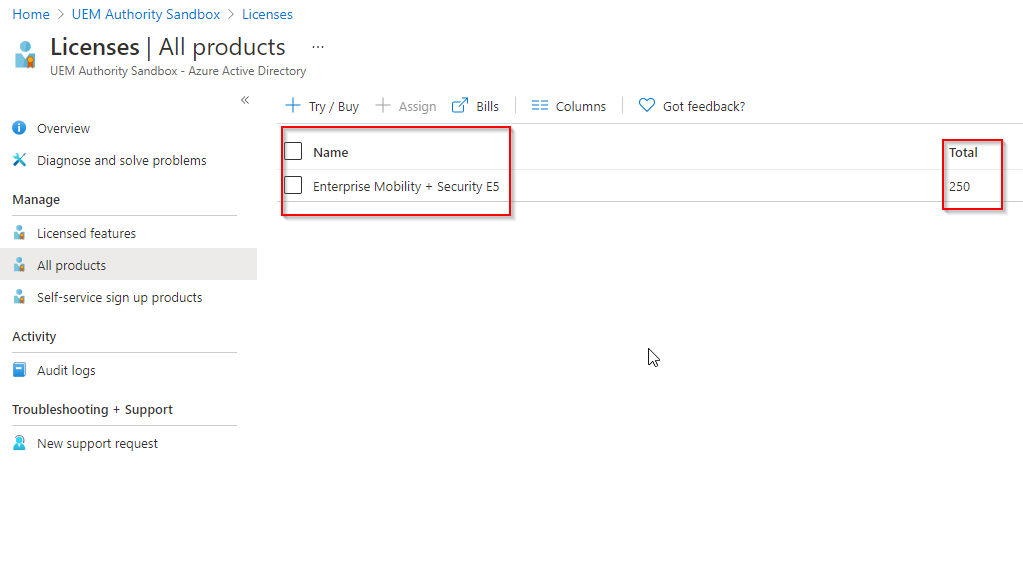
Under Manage, select ‘Licenses’.
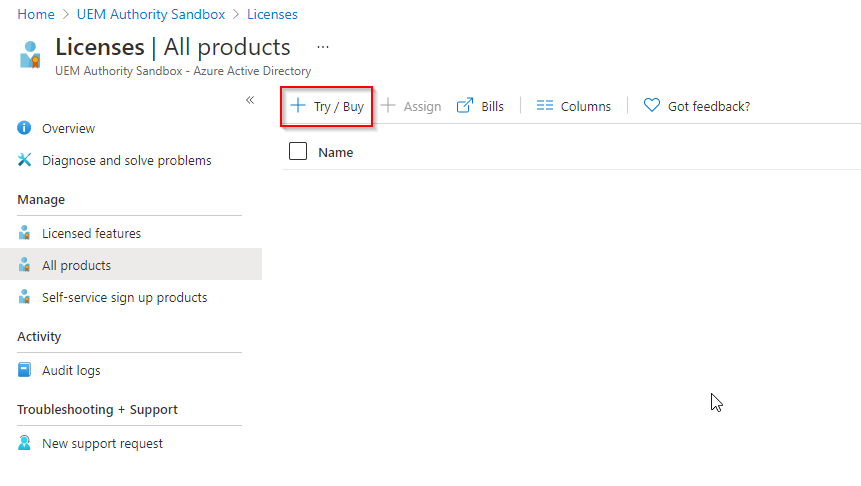
Select the ‘Assignments’ button.

Select ‘Enterprise Mobility + Security E5’.
Review licensing options to ensure the correct set of sub-services are included.
Select the ‘Save’ button.


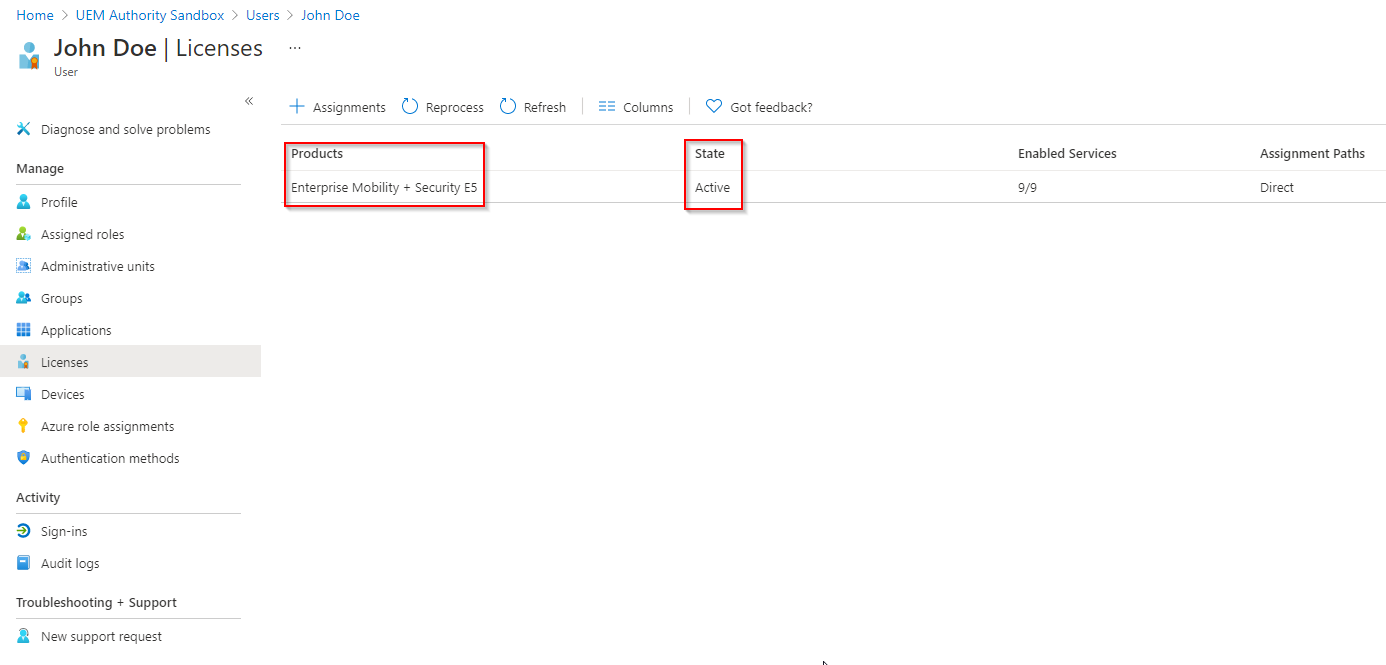
Once the trial license has applied to the user, you will see Enterprise Mobility + Security E5 present with an active state.
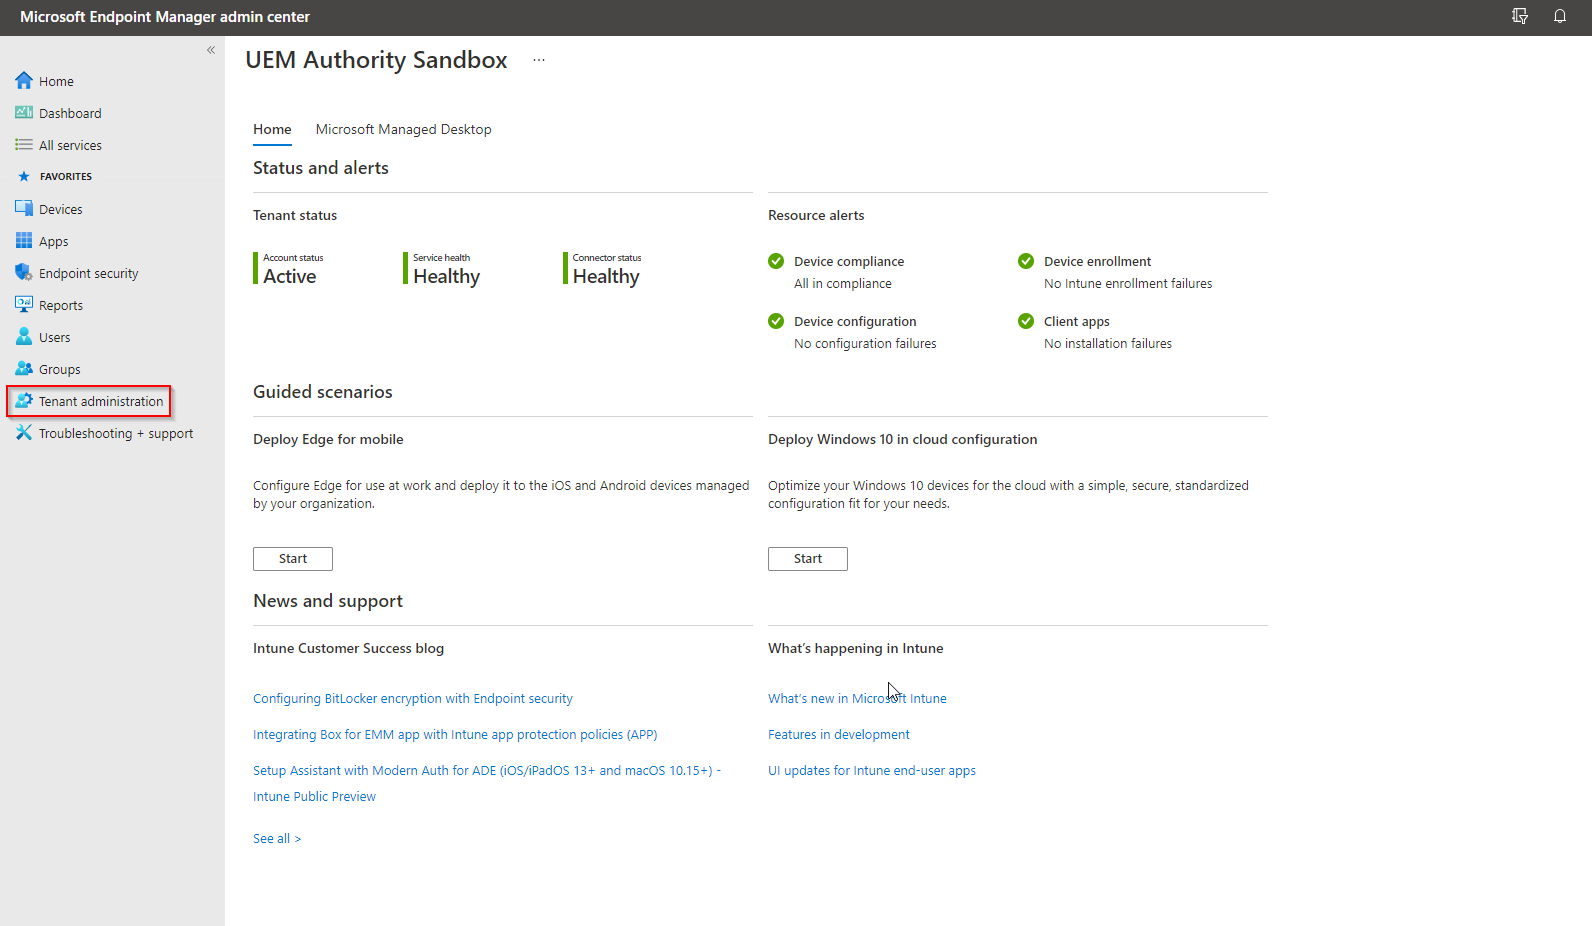
Set the MDM Authority for Intune
Sign in to your Endpoint Manager portal by browsing to https://endpoint.microsoft.com
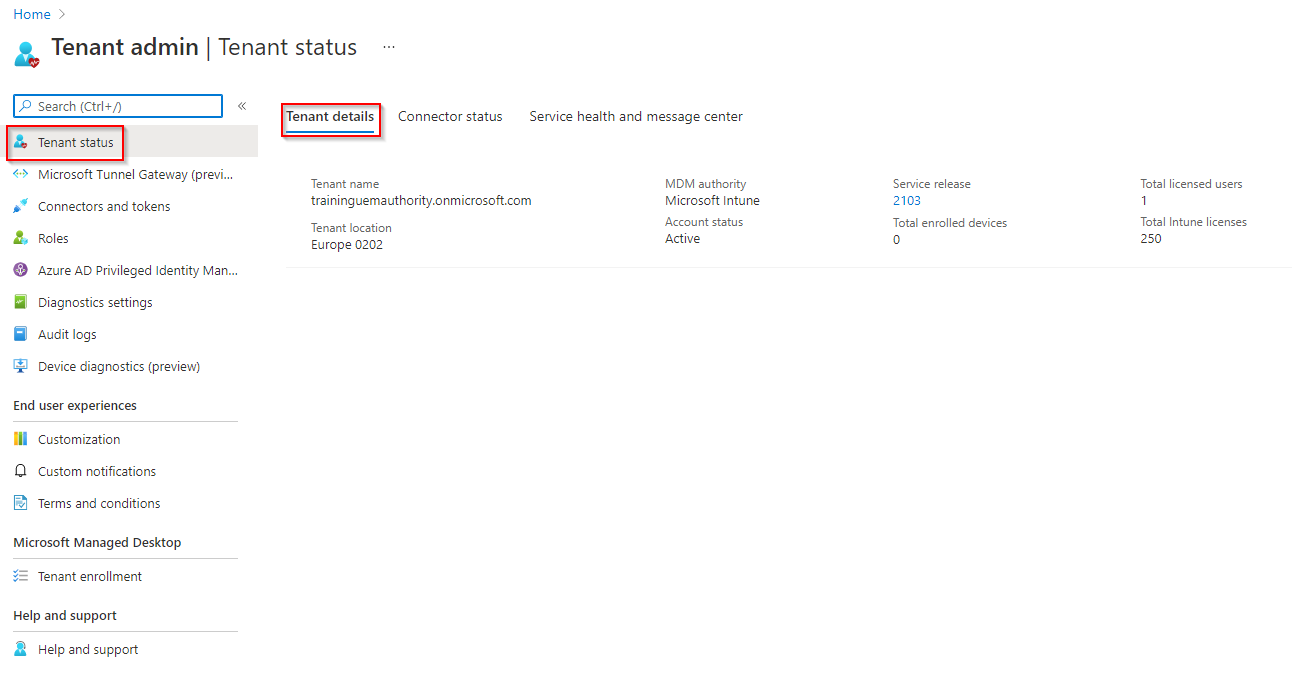
From the home dashboard, select ‘Tenant Administration’.
From the left menu, select Tenant Status > Tenant Status.

Select the Orange Banner from the top right corner of the Endpoint Manager portal.
If the banner is no longer visible, select the notifications icon to reveal the notification.
![]()
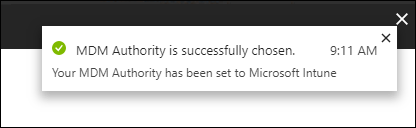
In the Mobile Device Management Authority dialogue box, select ‘Intune MDM Authority’

A message in the top right corner of the Endpoint Manager portal will indicate that you have successfully set the MDM authority.
To validate this, under Tenant Status > Tenant Details, MDM Authority is ‘Microsoft Intune’.

Episode 2 – Branding, Customisation & Terms and Conditions
Configure Company Portal Branding and Customisation
Sign in to your Endpoint Manager portal by browsing to https://endpoint.microsoft.com
From the home dashboard, select ‘Tenant Administration’.
Under ‘End User Experiences’ select ‘Customisation’.

Next to ‘Settings’ select the ‘Edit’ button.

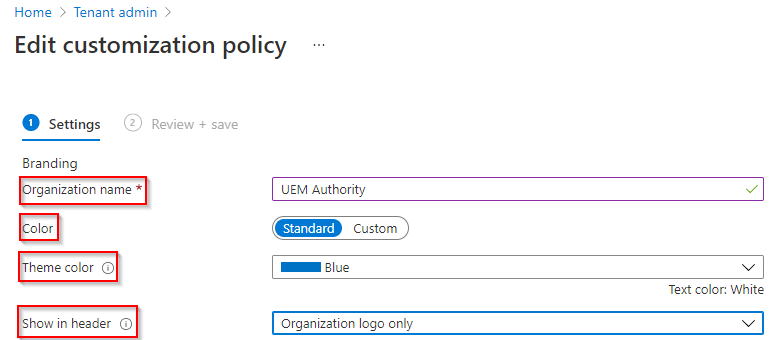
Under ‘Branding’, set an Organisation Name.
Our example here is UEM Authority.
Set a Standard or Custom colour by sliding the toggle.
If choosing Standard, select a colour from the ‘Theme Colour’ drop-down list.
If choosing Custom, define a custom colour by providing a Hex Code.
Select what should be displayed in the header of Company Portal app.
Our example will select Organisation Logo Only to be displayed in the header.
Upload a logo for the theme colour background.
(Max image size: 400 x 400 px. Max file size : 750KB. File type: PNG, JPG or JPEG)
Note – Upload the logo you want to show on top of your selected theme color. For the best appearance, upload a logo with a transparent background. You can see how this will look in the preview box below the setting.

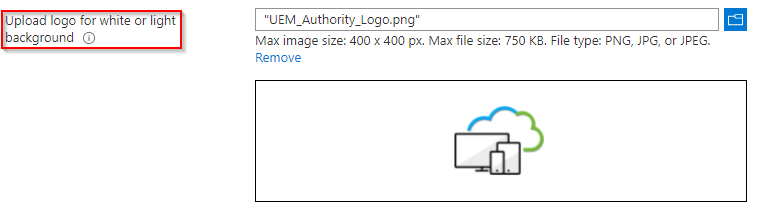
Upload a logo for a white or light background.
(Max image size: 400 x 400 px. Max file size : 750KB. File type: PNG, JPG or JPEG)
Note – Upload the logo you want to show on top of white or light-colored backgrounds. For the best appearance, upload a logo with a transparent background. You can see how this will look on a white background in the preview box below the setting.
Upload a brand image.
(Recommended image width: Greater than 1125 px. Max file size: 1.3 MB. File type: PNG, JPG, or JPEG.)
Brand image is displayed in these locations:
- iOS/iPadOS Company Portal: Background image on the user’s profile page.
- Windows Company Portal: Background image on the user’s profile page.
- Company Portal website: Background image on the user’s profile page.
- Android Intune app: In the drawer and as a background image on the user’s profile page.

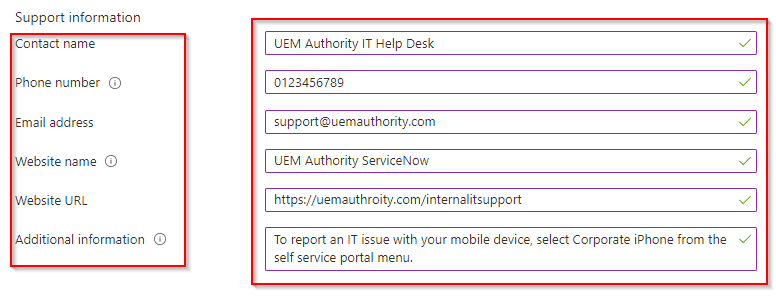
Top Tip – Enter your organisation’s support information, so employees can reach out with questions. This support information will be displayed on Support, Help & Support, and Helpdesk pages across the end-user experience.
Under Support Information, complete the optional information:
**Example**
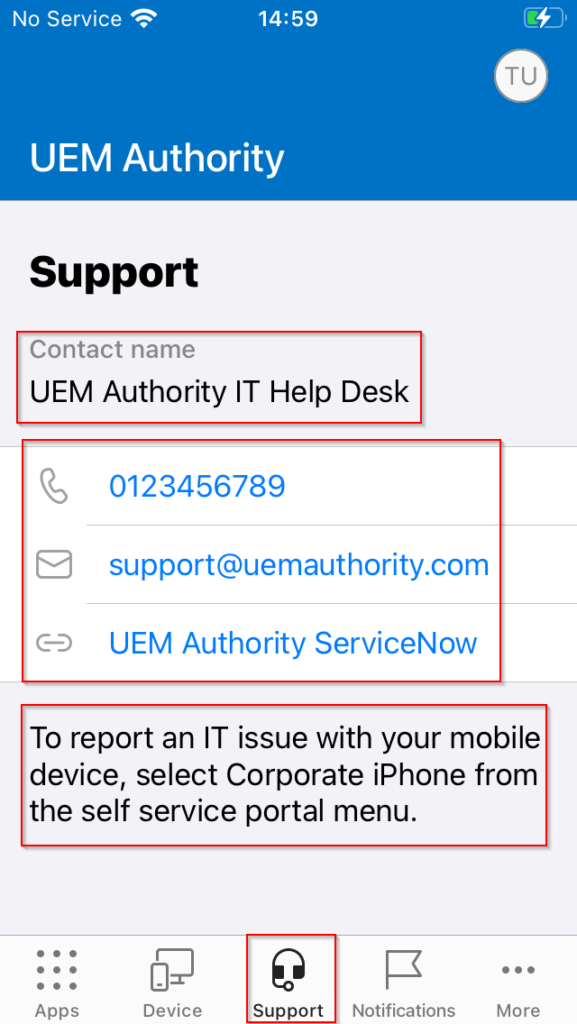
Contact Name: UEM Authority IT Help Desk
Phone Number: 0123456789
Email Address: support@uemauthority.com
Website Name: (This is a website-friendly name, so the ticketing and support system used by your organisation, such as ZenDesk or ServiceNow, etc.)
Website URL: https://uemauthority.com/internalitsupport for example
Additional Information: (Include any additional support-related messaging to users here.)
Under Configuration, you can customise the setup experience in Company Portal for Android and iOS/iPadOS devices.
Next to Device Enrolment, select the drop-down box to choose how users should be prompted to enroll into mobile device management.
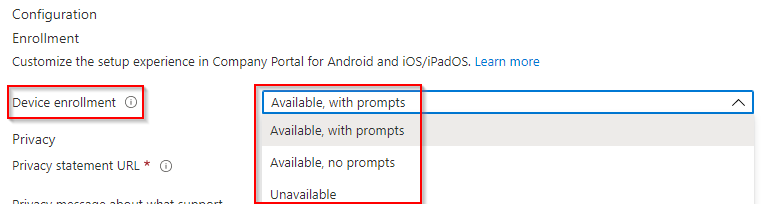
Next, provide a URL to send employees to your company’s Privacy Statement.

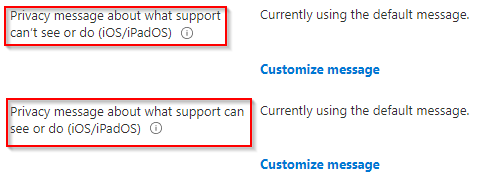
Next, we can retain the Endpoint Manager default Privacy message about what admins can’t/can see or do, or you may choose to define a custom message. (Applies to iOS/iPadOS only.)
Top Tip – Custom message input supports markdown so you can add bullets, bolding, italics, and links.
Depending on the use case and its respective transparency obligation, you can choose to configure a push notification to send to both your Android and iOS Company Portal users when their device ownership type has been changed from Personal to Corporate as a privacy courtesy.
Choose ‘Yes’ or ‘No’ for Device Ownership Notification.

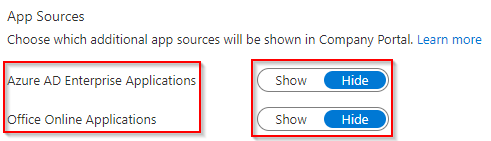
Note – App Sources settings apply to Windows Company Portal app only.
Choose to ‘Hide’ or ‘Show’ Azure AD Enterprise Applications in the Company Portal for each end user.
Choose to ‘Hide’ or ‘Show’ Office Online Applications in the Company Portal for each end user.
To help prevent unintended device actions, you can customise the available self-service device actions that are shown to end users in the Company Portal app:
**Example**
Hide Remove button on corporate Windows devices: Toggled by default
Hide Reset button on corporate Windows devices: Not toggled
Hide Remove button on corporate iOS/iPadOS devices: Toggled
Hide Reset button on corporate iOS/iPadOS devices: Toggled

Select the ‘Review + Save’ button.

Under Policies, Endpoint Manager allows you to manage multiple customisation policies.
For this training guide, policies will not be explored, however, feel free to experiment.

See in Action
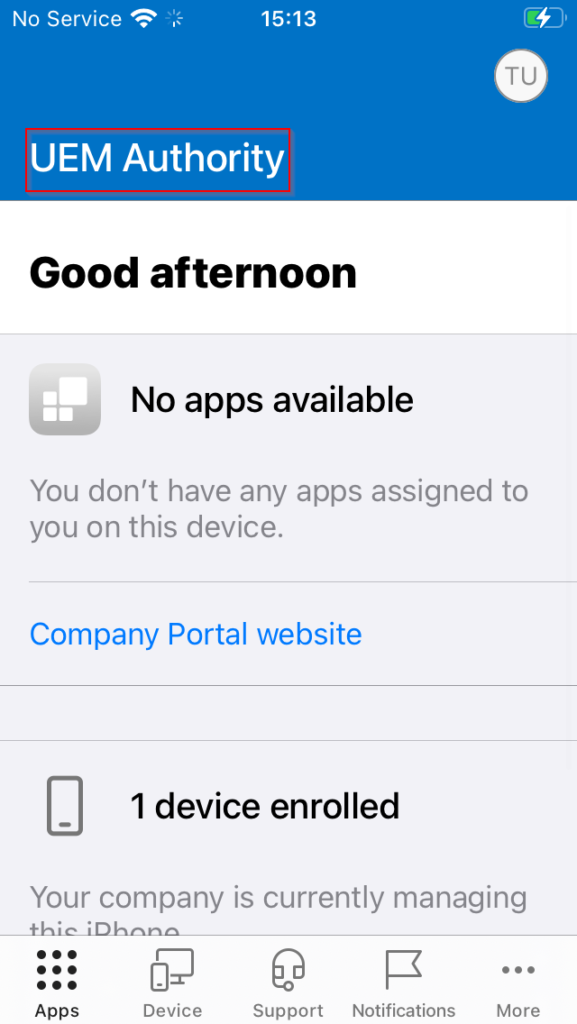
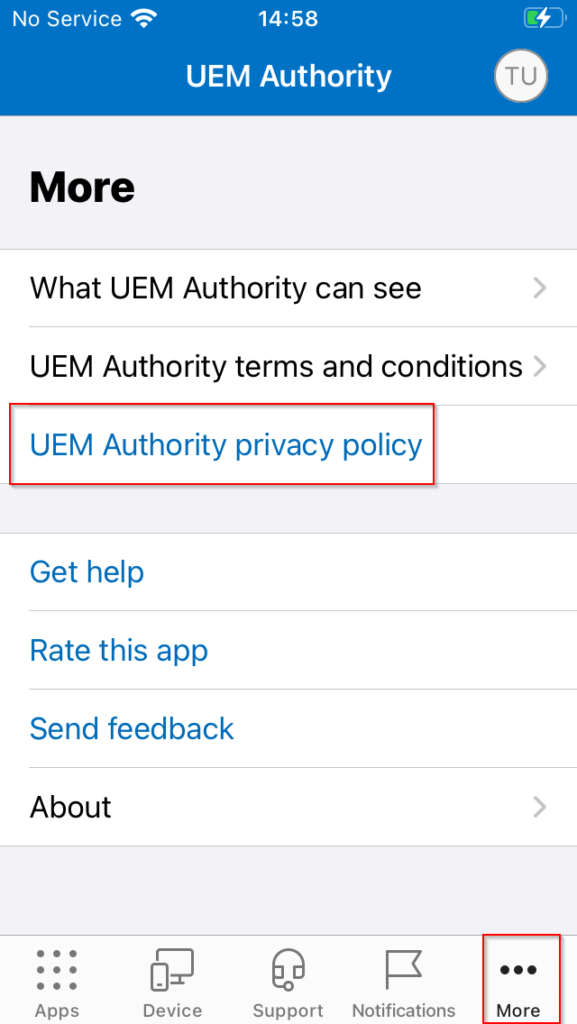
Note – Company branding may render different on certain form factors. For example, Windows 10 Company Portal app may display your company logo in the header banner, where Company Portal app for iPhone only shows the organisation name.
Post enrolment to Endpoint Manager on iPhone, the Company Portal app will display the organisation name in the header.
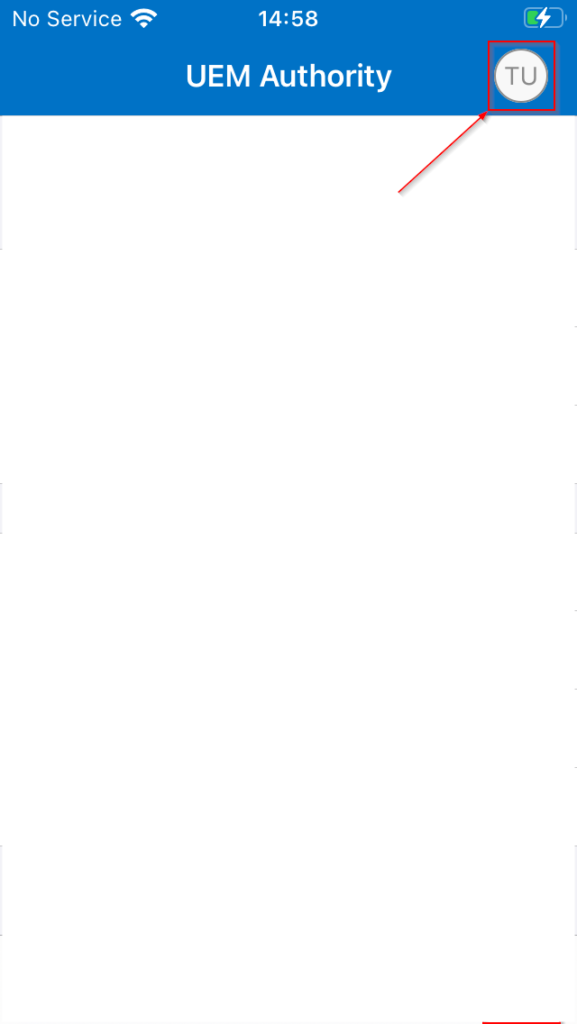
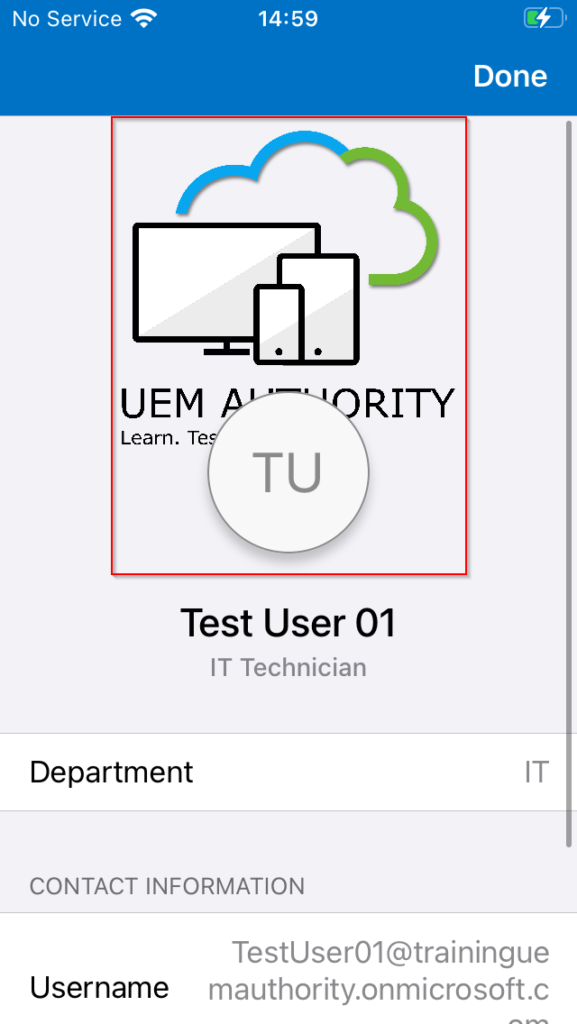
Selecting the user account icon, we can see UEM Authority logo applied as the background.
In the Support tab, we can see our support information applied.
Selecting More, Company Portal app lists additional custom information and links related to our organisation, such as a link to UEM Authority Privacy Policy.
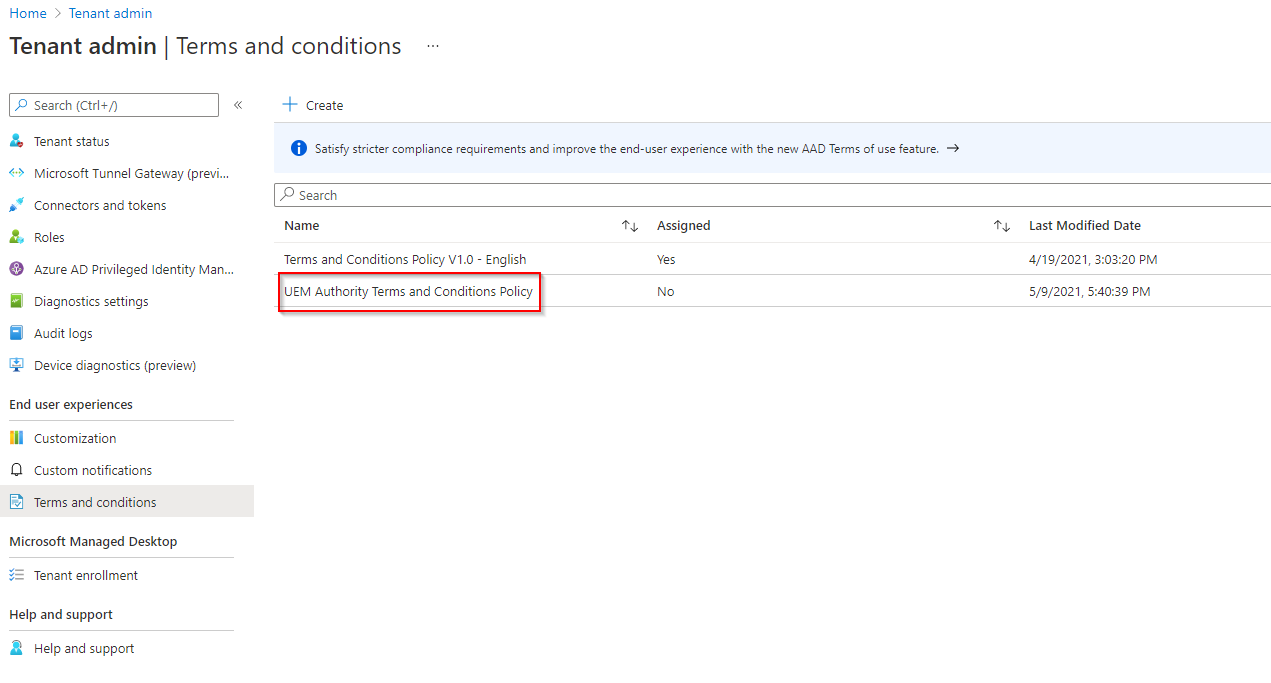
Configure an end-user Terms & Conditions policy
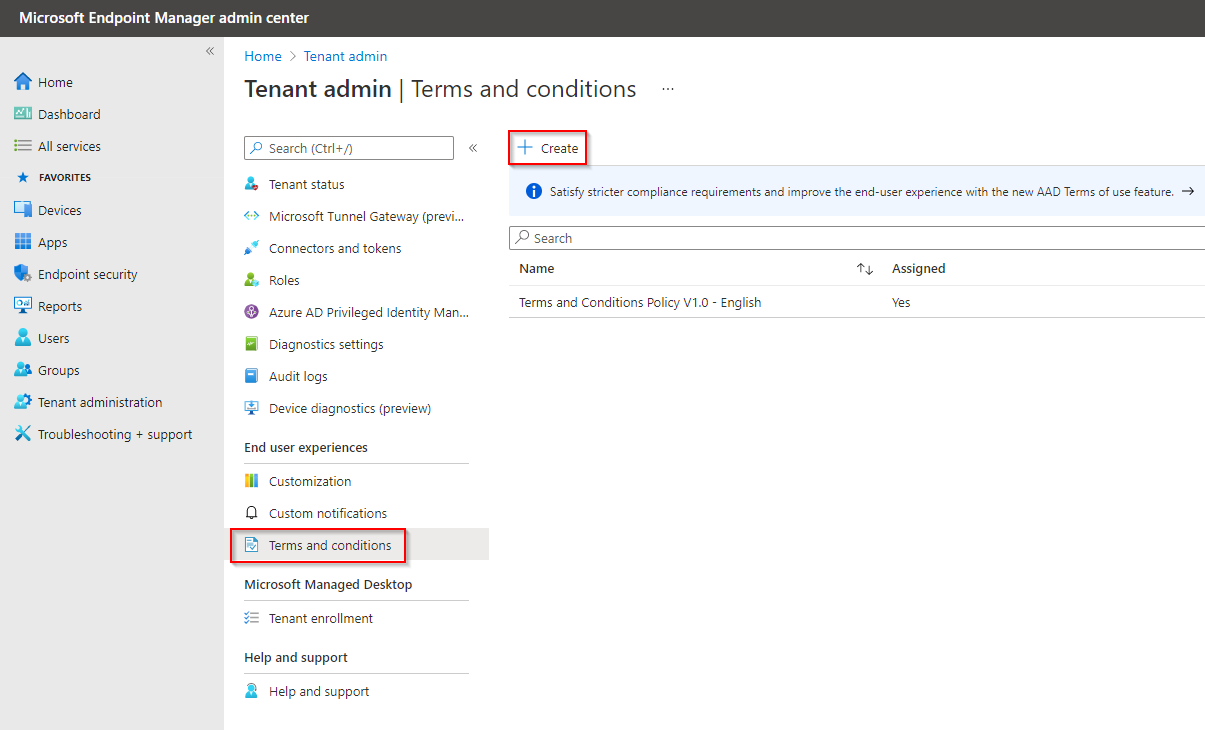
From the home dashboard, select ‘Tenant Administration’.
Under ‘End User Experiences’ select ‘Terms and Conditions’.
Select the ‘Create’ button.
Set a Name and Description.
Select the ‘Next’ button.

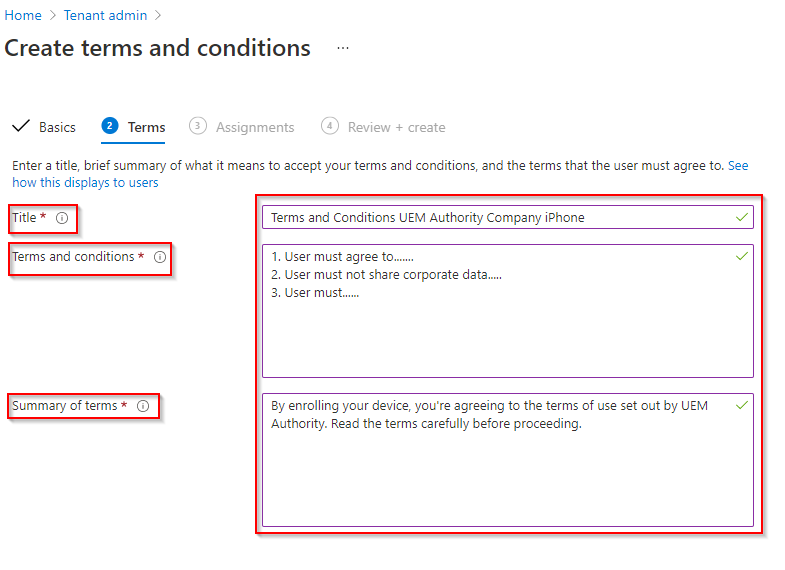
Complete the required information:
**Example**
Title: The name for your terms that users see in the Company Portal above the Summary.
Terms and Conditions: The terms and conditions that users see and must either accept or reject.
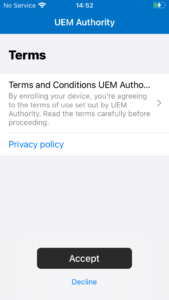
Summary of Terms: Text that explains what it means when users accept the terms. For example, “By enrolling your device, you’re agreeing to the terms of use set out by UEM Authority. Read the terms carefully before proceeding.”
Select the ‘Next’ button.
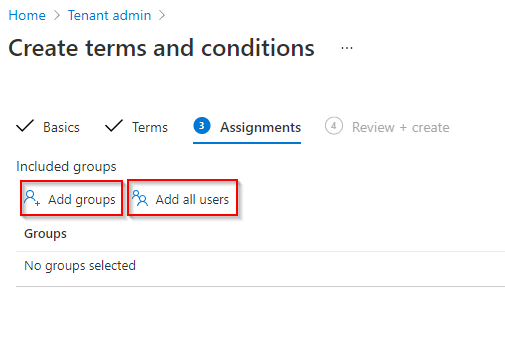
On the Assignments page, choose whether to target select groups or all enrolled users.
Select the ‘Next’ button, then select the ‘Create’ button.
Once created, you will see the new policy populate in the Terms and Conditions settings overview pane.
See in Action
During enrolment to Endpoint Manager, Company Portal app will display a Terms & Conditions policy applied by your organisation. The user is given a choice to accept or decline.
Episode 3 – Apple APNS & Managed Google Play
Create an APNS Apple ID
Open a browser and navigate to https://identity.apple.com/pushcert
Sign in with your Apple ID or select the ‘Create yours now’ button to register for an Apple ID.

Top Tip – The certificate is associated with the Apple ID used to create it. As a best practice, use a company Apple ID for management tasks and make sure the mailbox is monitored by more than one person like a distribution list. Never use a personal Apple ID.
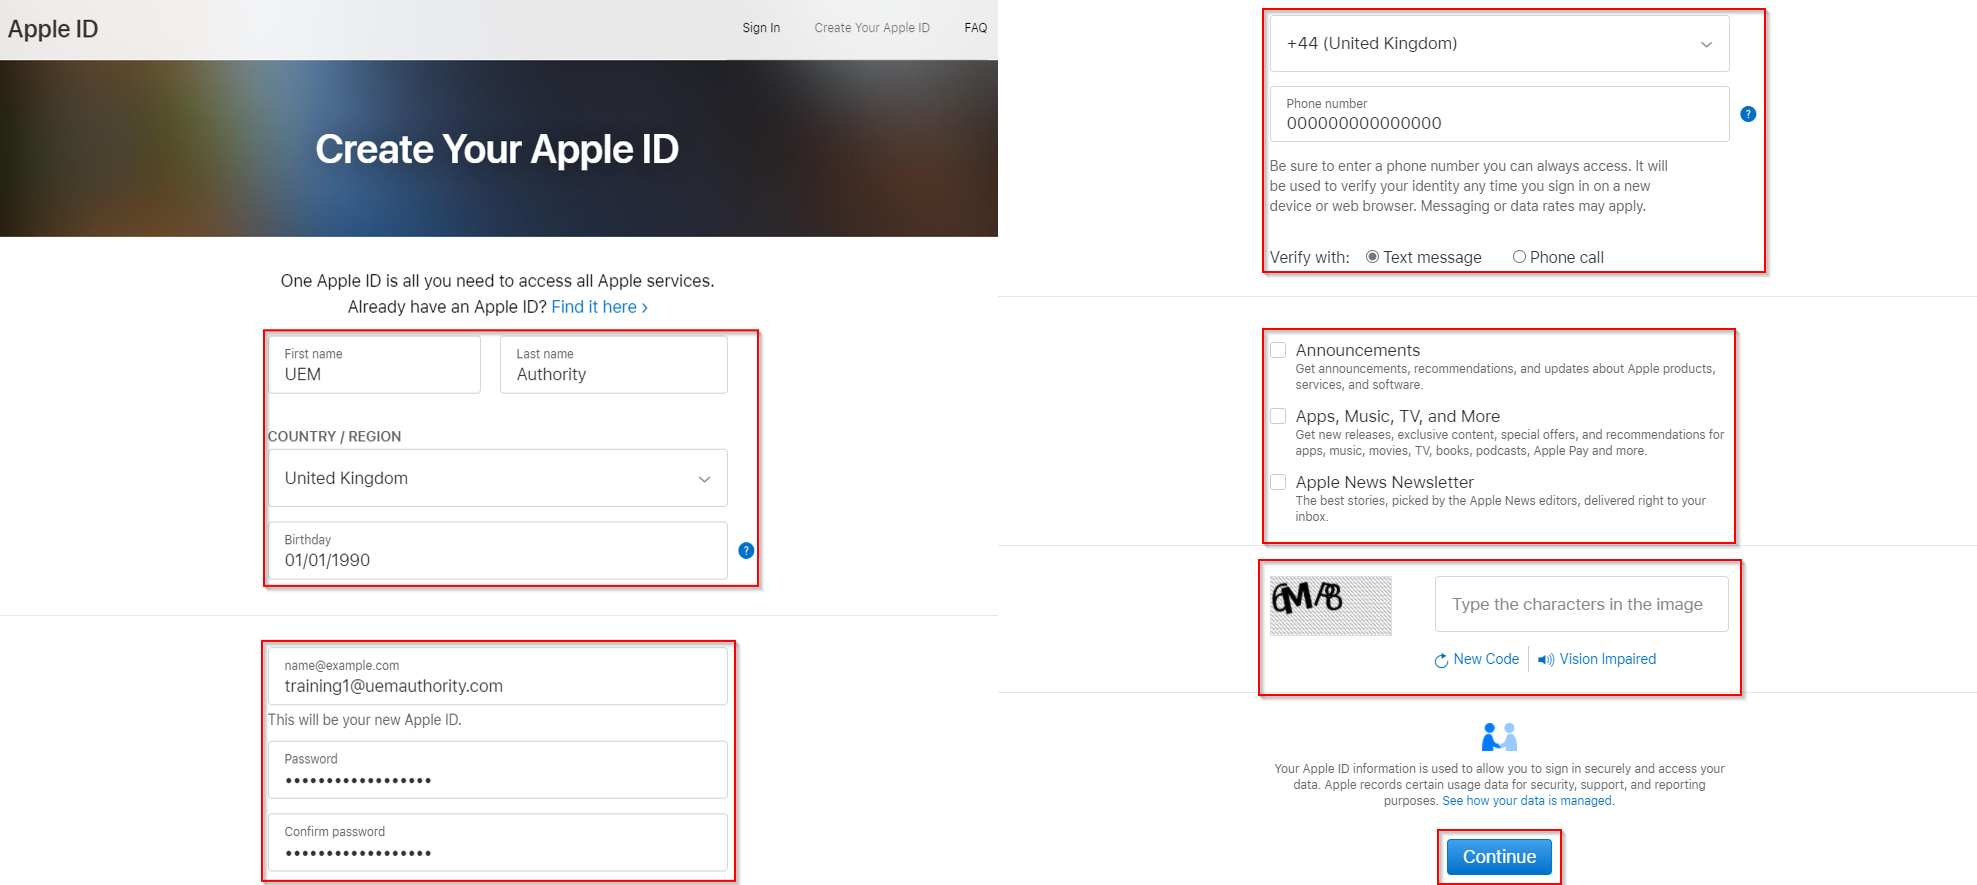
To create an Apple ID, complete the required information:
**Example**
First Name: UEM
Last Name: Authority
Country/Region: United Kingdom
Birthday: 01/01/1990
Email Address: training1@uemauthority.com
Password: (8 characters or more, Upper and lowercase letters & At least one number)
Area Code: +44 United Kingdom
Phone Number: 0000000
2FA Verify Method: Text Message
Marketing Preference: None toggled
Security Code: Type the characters in the image
Select the ‘Continue’ button to complete registration.
You will now be required to verify the account, Apple will:
- Send you an email containing a verification code.
- Validate 2FA using the provided phone number, whether by text message or phone call.

Once your Apple ID account is verified, navigate back to https://identity.apple.com/pushcert and sign in with your Apple ID.
Configure Apple APNS certificate for Intune
Note – During these steps, you will flick back and forth between Apple Push Certificates Portal and Endpoint Manager console. Ensure you are signed into Endpoint Manager console in a new browser tab.
Select the ‘Create a Certificate’ button to get started.

Select the toggle box to acknowledge you agree to Apple’s terms and conditions.
Select the ‘Accept’ button to proceed.

Switch tabs to Endpoint Manager console.
Navigate to Devices > Enroll Devices > Apple Enrollment > Apple MDM Push Certificate


At Step 1, select the toggle box to acknowledge you agree for Microsoft to send user and device information to Apple.
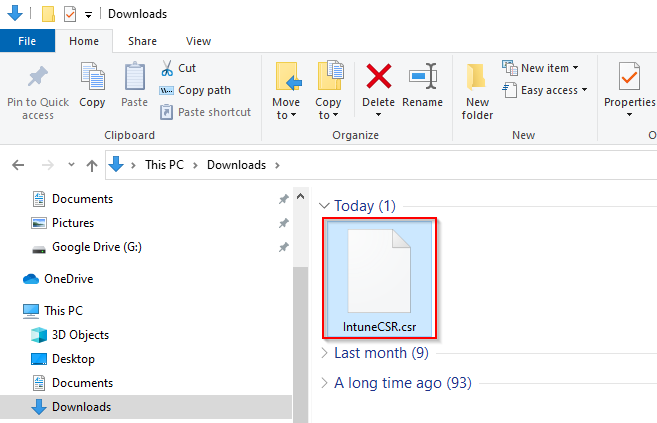
At Step 2, select ‘Download your CSR’.

Switch tabs to Apple Push Certificates Portal.
Under Notes, provide a comment to differentiate this certificate from others. (Handy when you carry out a certificate renewal).
Select the ‘Choose File’ button. Select the recently downloaded IntuneCSR.csr file.


Select the ‘Upload’ button.

Select the ‘Download’ button to download the MDM APNs certificate (which is a .pem file).


Switch tabs to Endpoint Manager console.
At ‘Step 4’, input the same Apple ID used to create the certificate.
At ‘Step 5’, browse and locate the recently downloaded MDM APNs certificate (which is a .pem file).

Select the ‘Upload’ button.

Intune will notify you as to a successful MDM Push Certificate creation.

Scroll to the top of the dialogue box in order to validate a successful configuration. Hopefully, you will observe the following:
Status: Active
Days until expiration: 365 (From the date of Last Updated)
Last Updated: Date certificate was created
Expiration: 365 days from date certificate was created
Apple ID: Same Apple ID used to create the certificate.
 Should the MDM Push Certificate process fail or the status returns an error, delete the Endpoint Manager configuration and repeat this section again from the beginning.
Create a Managed Google Play Account
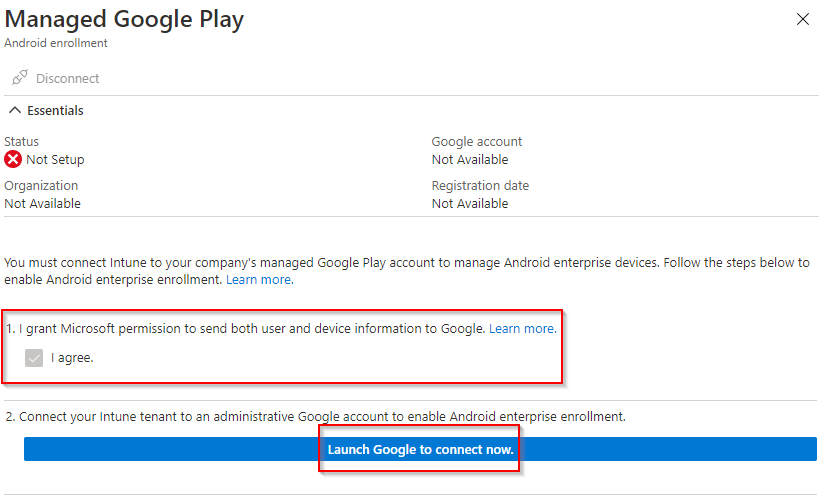
In the Endpoint Manager Console, navigate to Devices > Enroll Devices > Android Enrollment > Managed Google Play

At Step 1, select the toggle box to acknowledge you agree for Microsoft to send user and device information to Google.
At Step 2, select ‘Launch Google to Connect Now’.
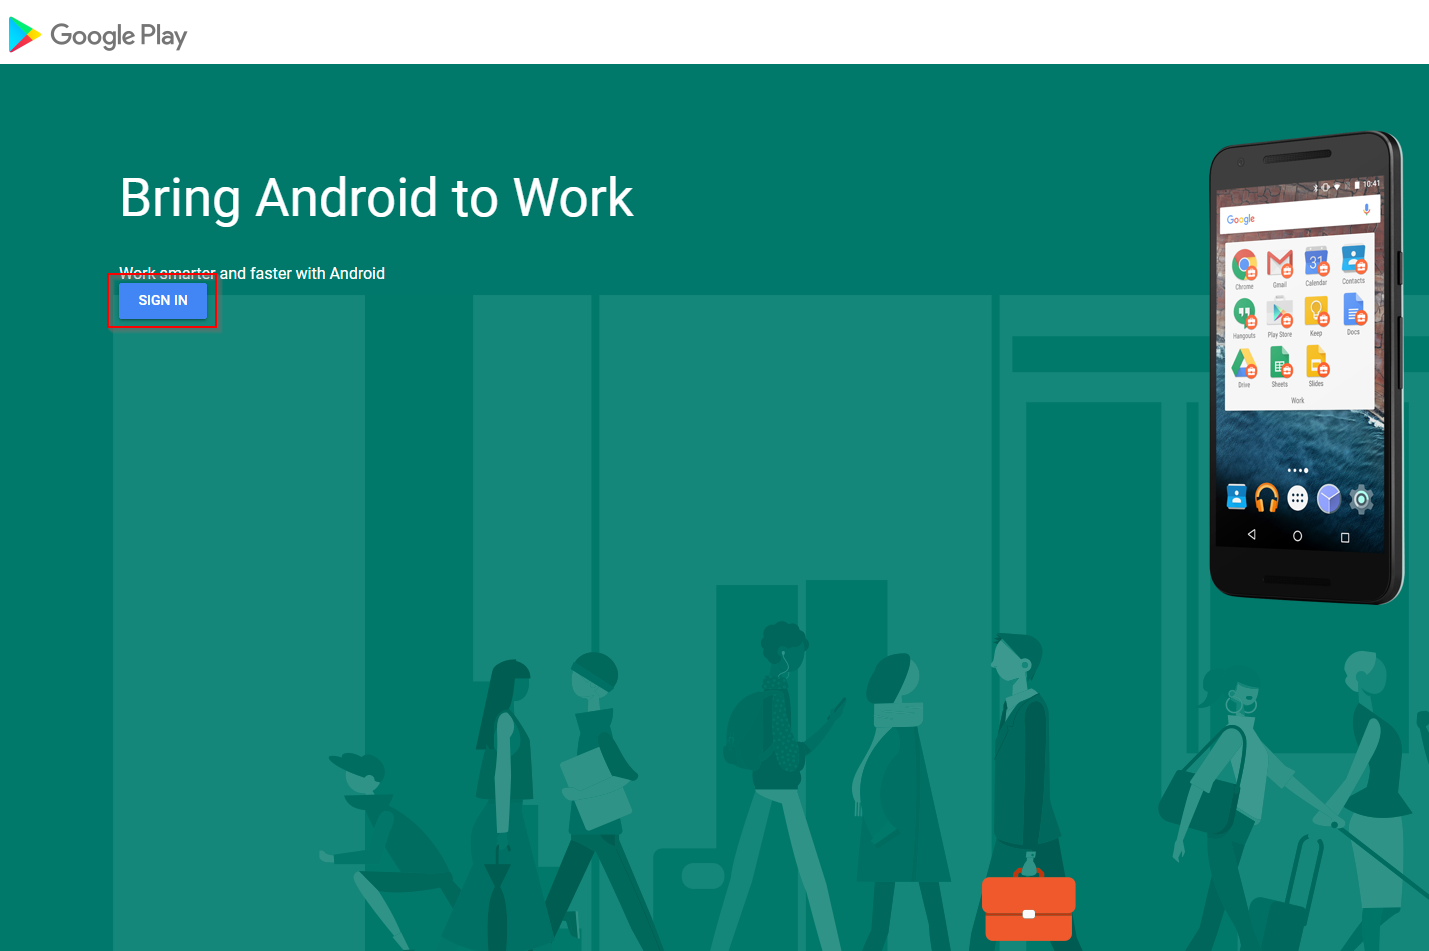
Google Play will open in a new window, select ‘Sign In’.
Select ‘Create Account’, then select ‘For Myself’.
Top Tip – The Managed Google Play integration is associated with the Google Account used to create it. As best practice, use a consumer Google Account, which belongs to your organisation for management tasks and make sure the mailbox is monitored by more than one person like a distribution list.

To create a Google Account, complete the required information:
**Example**
First Name: UEM
Last Name: Authority
Username: uemauthority@gmail.com
Password: (8 characters or more, Upper and lowercase letters & At least one number)
Phone Number: 0000000
Recovery Email Address: (Use an email address that belongs to your company domain. A shared mailbox for admins only, for example)
Birthday: 01/01/1990
Gender: (Your preference)
Birthday: 01/01/1990

 Personalisation Settings: Express Personalisation
Select ‘Next’ to confirm personalisation settings.

Select ‘Confirm’ to acknowledge how Google will use your account data.

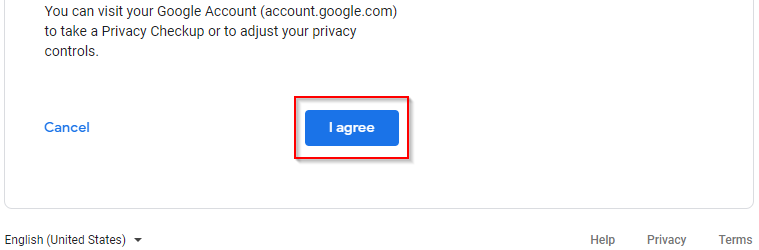
Select ‘I Agree’ to agree with Google privacy and terms.
You have now created a Google Account.
Configure Managed Google Play for Intune
In the Endpoint Manager Console, navigate to Devices > Enroll Devices > Android Enrollment > Managed Google Play
At Step 1, select the toggle box to acknowledge you agree Microsoft to send user and device information to Google.
At Step 2, select ‘Launch Google to Connect Now’.
Google Play will open in a new window, select ‘Sign In’.
Once signed in with the Google Account created in the last section or a Google Account already belonging to your company, select ‘Get Started’.

Enter your organisation business or trading name.
You will see Microsoft Intune is identified as the EMM provider.
Select ‘Next’.

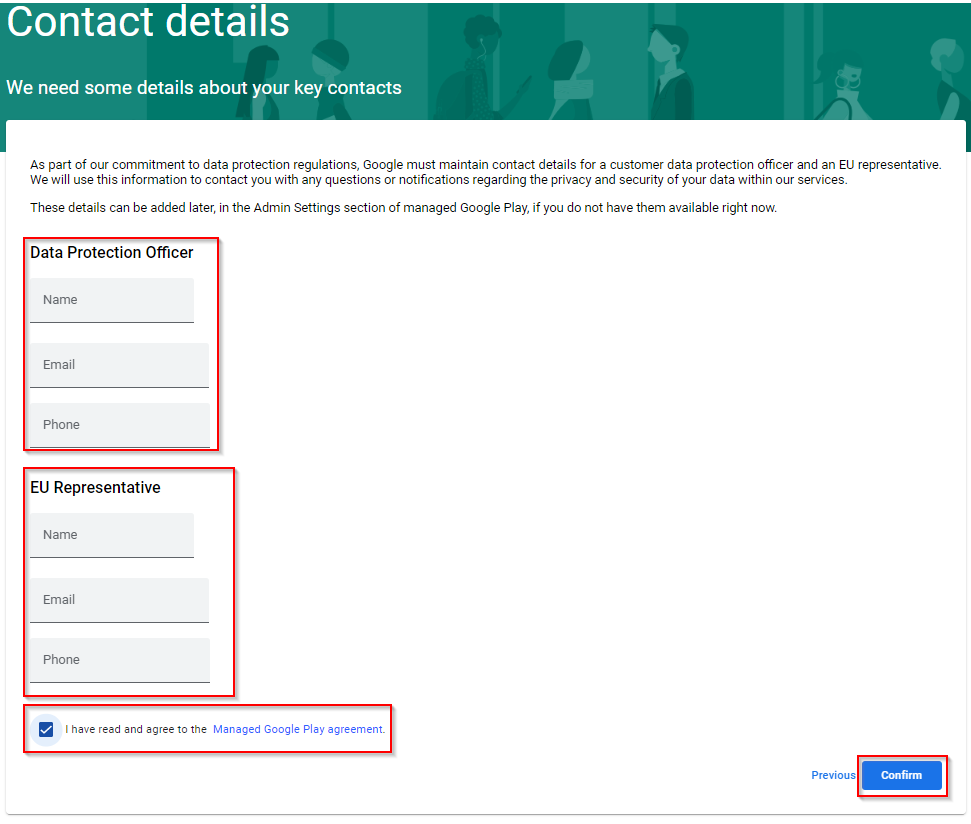
Note – This next section is optional. Data Protection Officer and EU Representative contact details can be added later, in the Google Account admin portal, if you do not have them to hand right now.
Toggle the tick box to acknowledge that you have read and agree to Managed Google Play Agreement.
Select ‘Confirm’ to continue.
Select ‘Complete Registration’ to finish the setup.
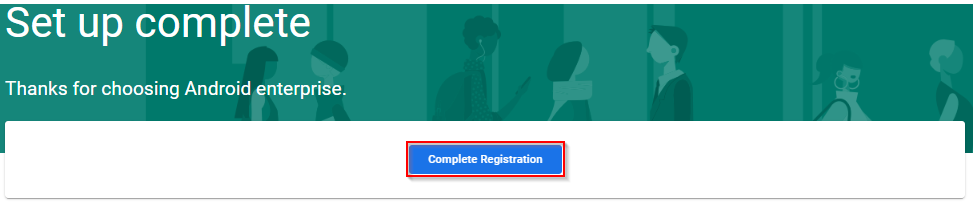
Head back to your Endpoint Manager console. Observe a notification appear to confirm “Managed google Play successfully configured with tenant”
To confirm a successful integration, the following information should be present:
Status: Setup (With green tick)
Organistion: Your organisation name or trading name
Google Account: The Google Account used to set up integration
Registration Date: The date and time Managed Google Play was configured

Managed Google Play is now integrated with your Endpoint Manager tenant.
Episode 4 – Device Enrolment (DEM) Manager & Enrolment Restrictions
Create a DEM account
Note – A Device Enrolment Manager account must be assigned an Intune license before the account can be added.
Sign in to your Endpoint Manager portal by browsing to https://endpoint.microsoft.com
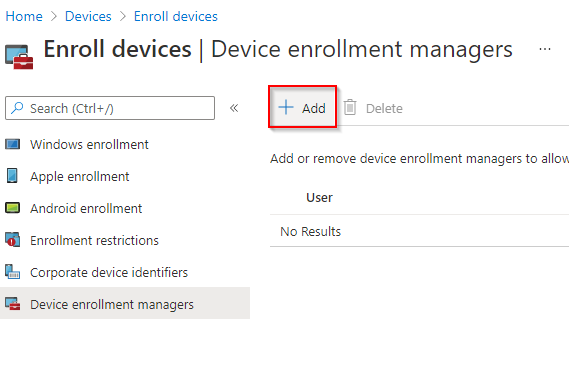
From the home dashboard, navigate to Devices > Enrol Devices > Device Enrolment Managers.

Select the ‘Add’ button.
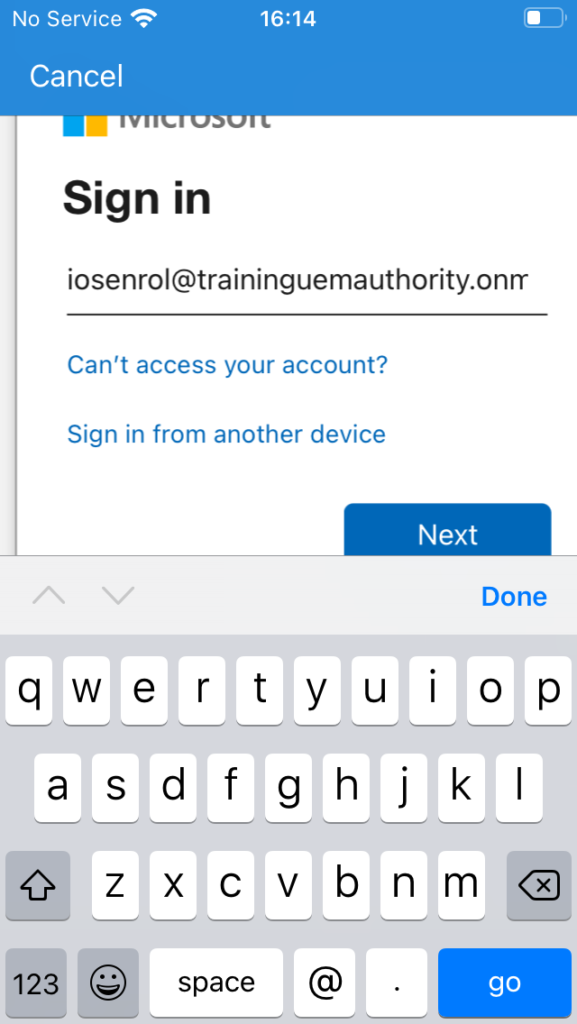
Enter the UPN of the Azure AD account to be added as a Device Enrolment Manager, then select the ‘Add’ button.
**Example**
UPN: iOSEnrol@traininguemauthority.onmicrosoft.com

Intune will notify you as to a successful Device Enrolment Manager creation.

You will see the Device Enrolment Account present in the list, ready to enrol devices.

See in Action
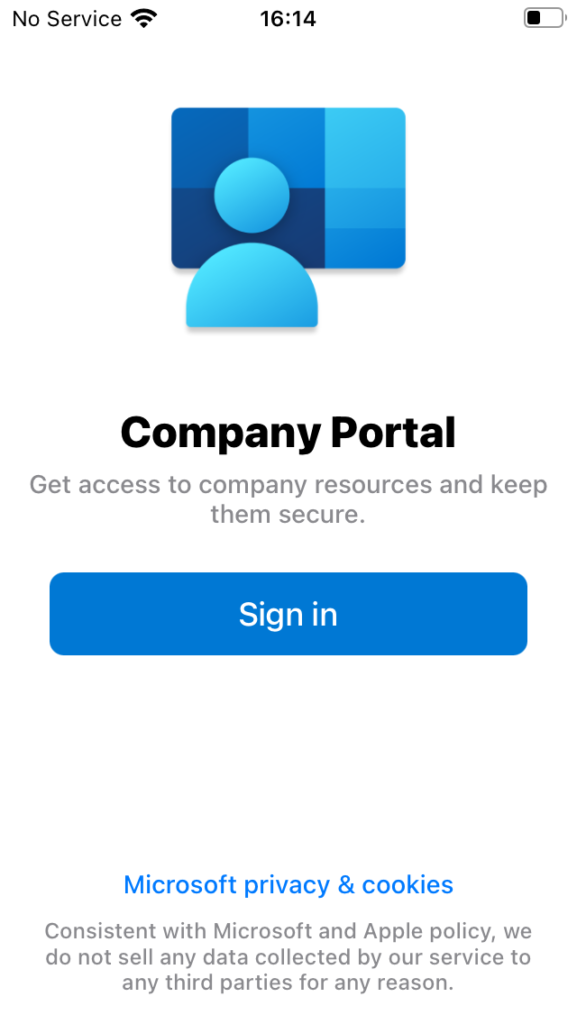
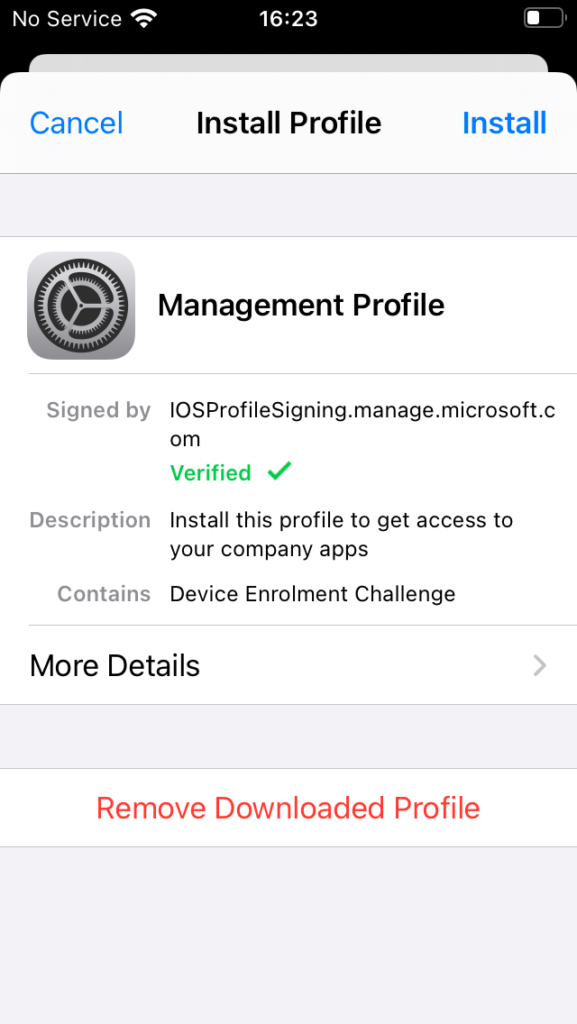
To enrol using a DEM account, in this example an iPhone, we follow the standard manual enrolment process.
Once complete, Company Portal app confirms the device is enroled however using a DEM account carries limited capabilities.

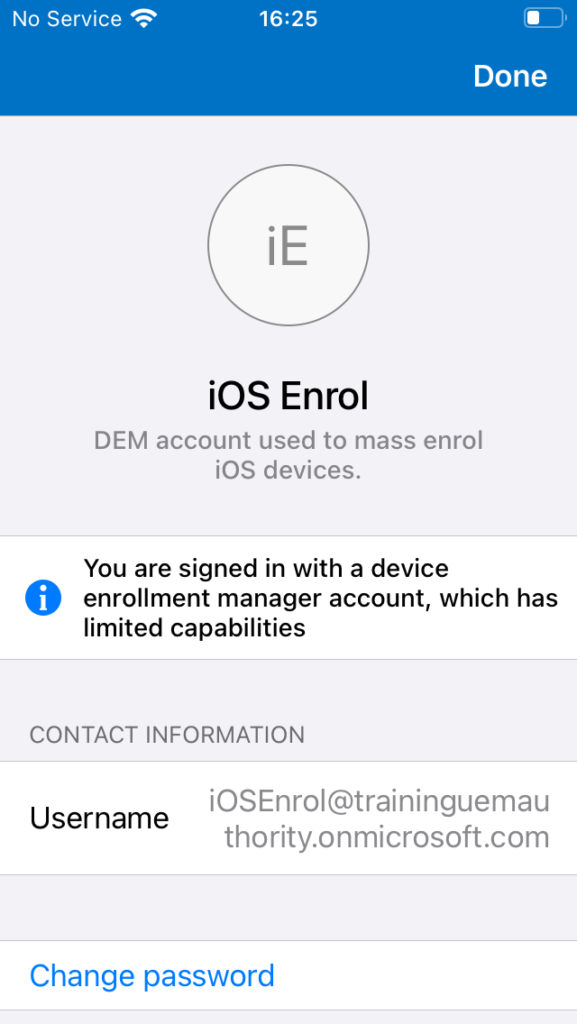
Intune (Endpoint Manager) console also confirms the iPhone is enroled, observing iOS Enrol DEM account as the Primary User.

Configure Device Type Restrictions
Note – Enrollment restrictions are not security features. Compromised devices can misrepresent their character. These restrictions are a best-effort barrier for non-malicious users.
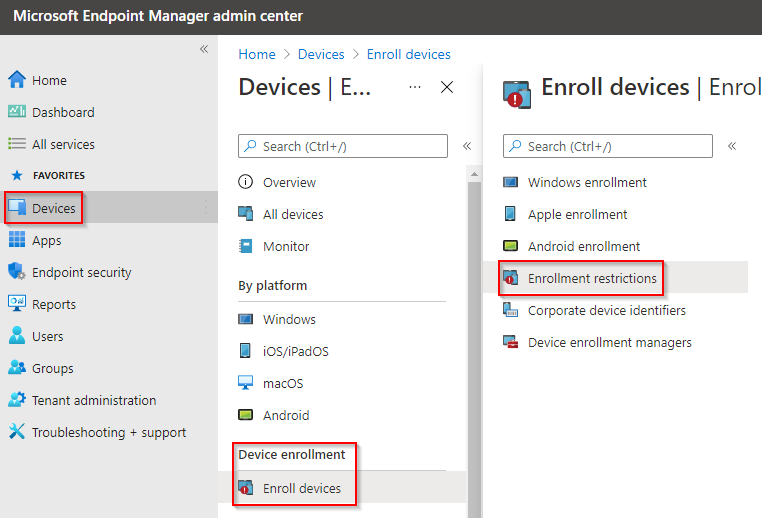
From the home dashboard, navigate to Devices > Enrol Devices > Enrolment Restrictions
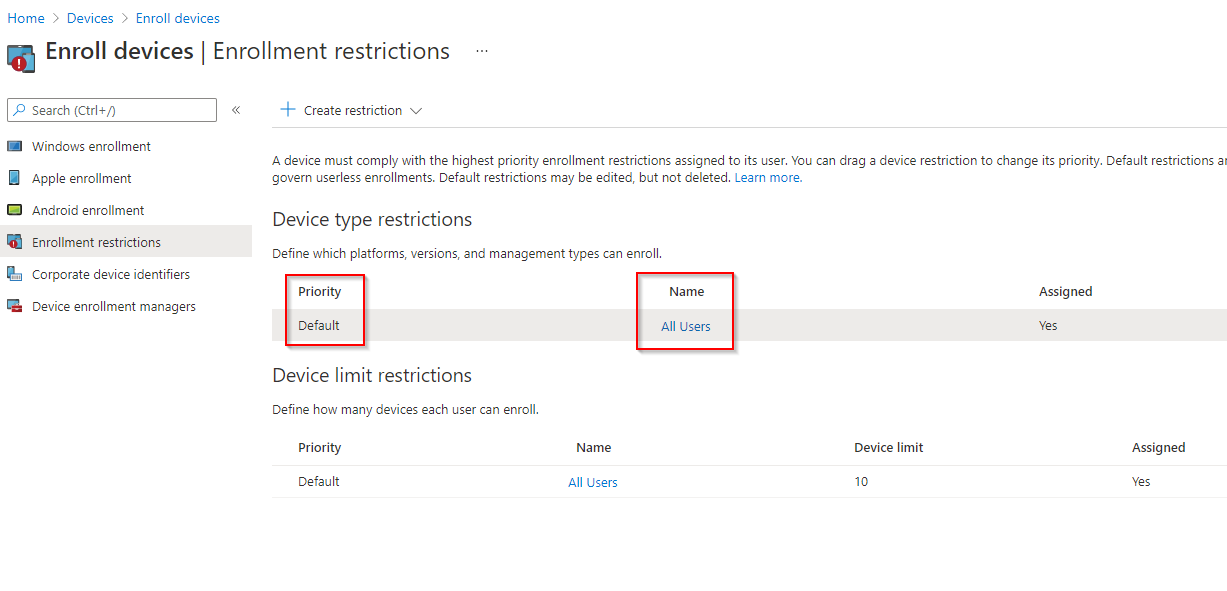
Under Device Type Restrictions, select the Default Policy called All Users.
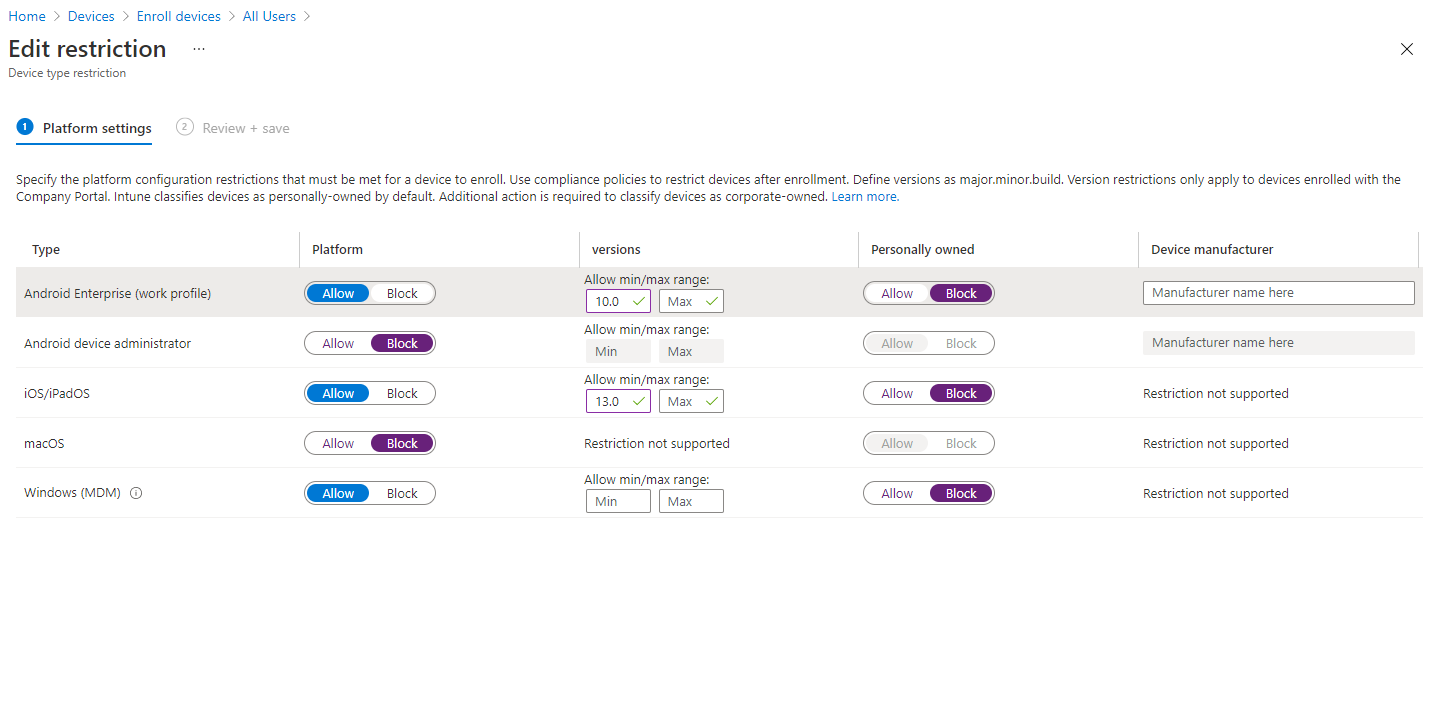
Select Properties. Under Platform Settings, select Edit.

In this example, the Default Policy will be modified to reflect the below settings:
**Example**
Android Enterprise (Work Profile)
- Platform: Allow
- Versions: 10.0 min
- Personally Owned: Block
Android Device Administrator
- Platform: Block
iOS/iPadOS
- Platform: Allow
- Versions: 13.0 min
- Personally Owned: Block
macOS
- Platform: Block
Windows (MDM)
- Platform: Allow
- Personally Owned: Block
Select ‘Review + Save’ and then ‘Save’.
Top Tip – A separate personally owned device type policy allows an organisation better control over whom and what has access to corporate resources. For example, an organisation may choose to limit personal device or BYOD enrolment to eligible users or personas. Device Type restriction enables such granular gate keeping.
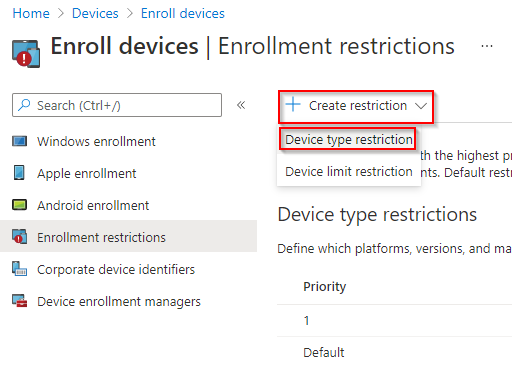
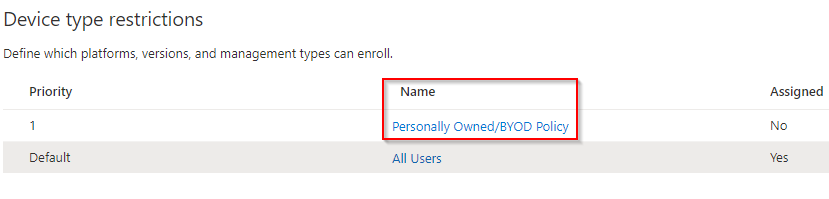
To create a personally owned or BYOD policy, using the best practice example below, select the ‘Create Restriction’ button.
Select the ‘Device Type Restriction’ option.
Set a Name and Description:
**Example**
Name: Personally Owned/BYOD Policy
Description: A device type restriction policy that limits enrolment of personally owned and BYOD devices to an eligible group of users.

Select ‘Next’.
Set the policy Platform Settings:
**Example**
Android Enterprise (Work Profile)
- Platform: Allow
- Versions: 10.0 min
- Personally Owned: Allow
Android Device Administrator
- Platform: Block
iOS/iPadOS
- Platform: Allow
- Versions: 13.0 min
- Personally Owned: Allow
macOS
- Platform: Block
Windows (MDM)
- Platform: Allow
- Personally Owned: Block

Select ‘Next’, and then ‘Next’.
Under Assignments, select ‘Add Groups’.
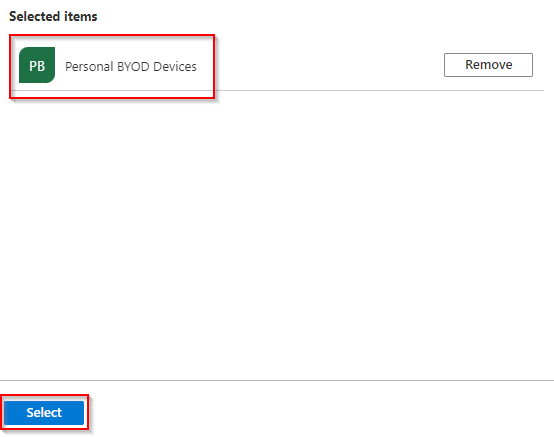
In this example, the ‘Personal BYOD Devices’ group will be selected.
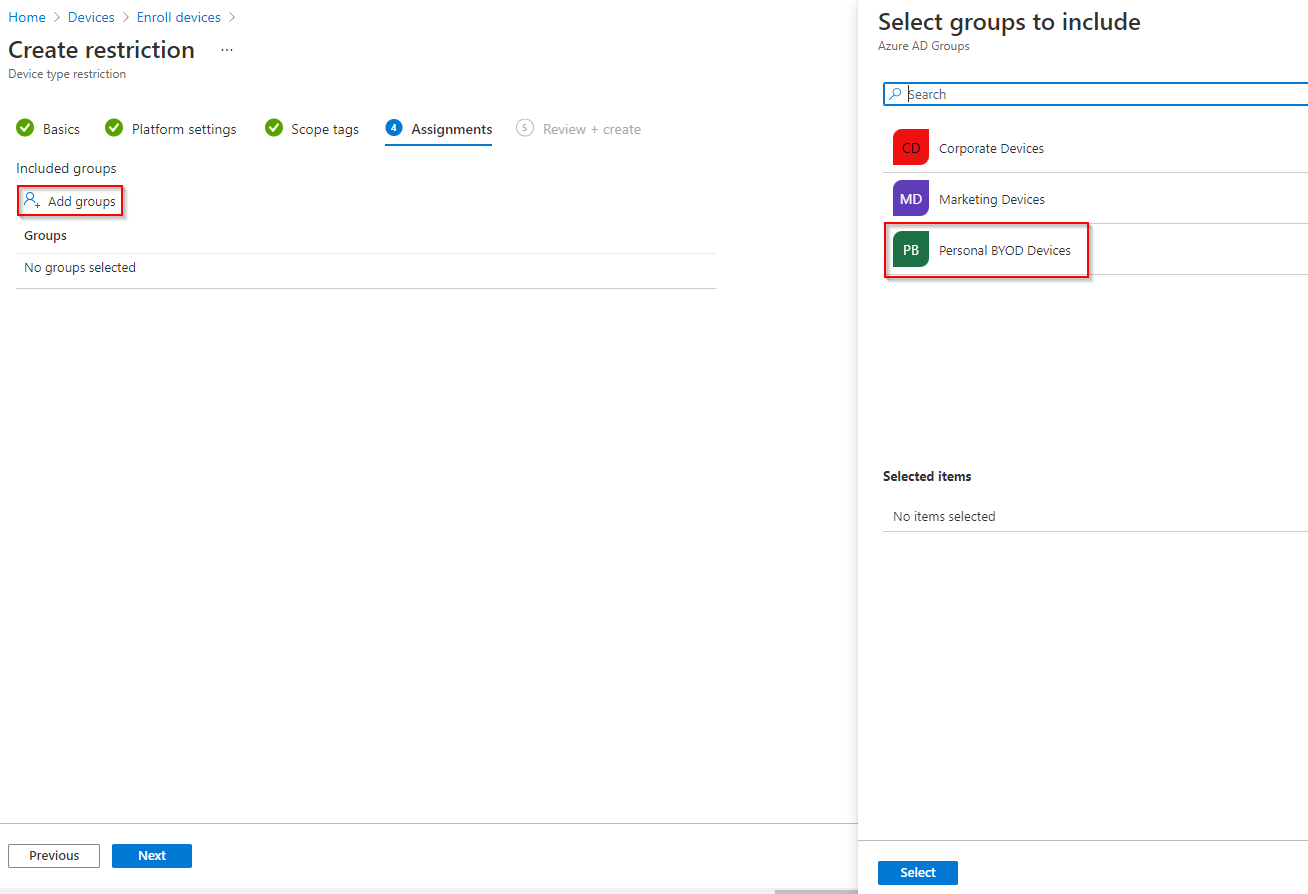
Select ‘Select’ to add your Azure AD Group.
Select ‘Next’ and then ‘Create’.
You will see the Device Type Restrictions policy appear ready for use.
See in Action
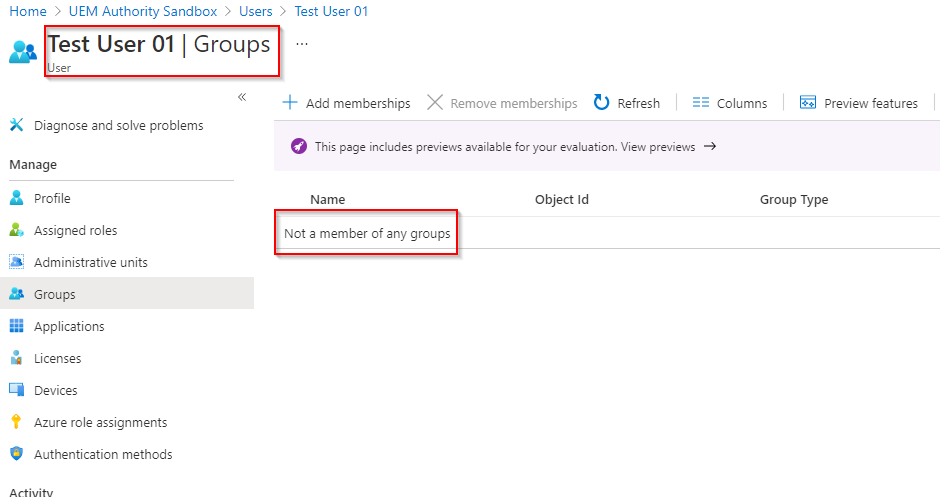
Top Tip – During Personally Owned/BYOD enrolment for an iOS/iPadOS device, the enrolment profile will fail to install. The Personally Owned Device Type Restrictions policy will block this device from being able to enrol. Generally, this means the user’s Azure AD/AD account does not yet reside in the eligible Azure AD Group.
Test User 01 Azure AD user account does not yet reside within any groups.
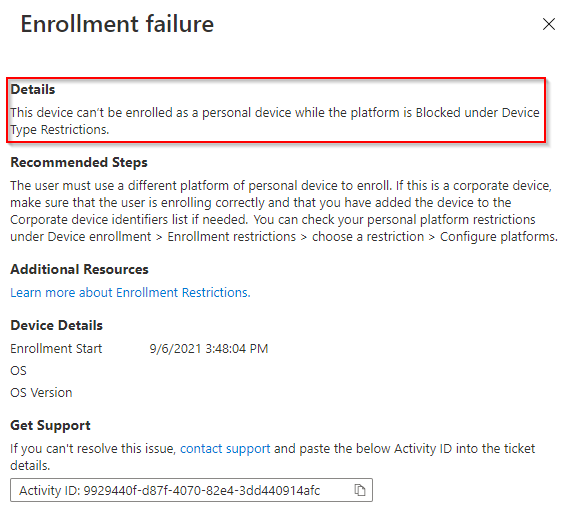
Attempting to enrol on an iOS device, installation of the profile will fail.

Observing Intune enrolment failures report under Devices > Monitor > Enrolment Failures, we can see the reason why enrolment was blocked.

Configure Device Limit Restrictions
From the home dashboard, navigate to Devices > Enrol Devices > Enrolment Restrictions
Under Device Type Restrictions, select the Default Policy called All Users.

Select Properties. Under Platform Settings, select Edit.

In this example, the Default Policy will be modified to reflect the below settings:
**Example**
Device Limit: From 10 to 5

Select ‘Review + Save’ and then ‘Save’.