Workspace ONE Access can provision users into Workspace ONE UEM.
Integration with Workspace ONE UEM
Active Directory (AD) is a directory service that runs on Microsoft Windows Server. The main function of Active Directory is to enable administrators to manage permissions, and control access to network resources. In Active Directory, data is stored as objects, which include users, groups, applications, and devices. so you have all your company users stored at Microsoft Active Directory.
We need to sync Active Directory in Workspace ONE UEM, so we can get all users stored in Active Directory to Workspace ONE UEM portal, so any changes within Active Directory will be synced to Workspace ONE UEM, so you don’t have to worry if some user leaves your organization. If you disable his/her user from Active Directory, it will be disabled automatically from the Workspace ONE UEM portal, also integrating with directory services eliminates the need to create basic user accounts in your organization. This synchronization performs necessary updates across all devices for affected users.
Prerequisites:
- On-premises Active Directory with users available to add to the Workspace ONE UEM tenant.
2. Windows server machine in your internal environment domain-joined only, and no need to be a domain controller (we will install the integration component on it).
3. Network firewall rules: it will require port 443 outbound from your internal network, it will set up the connection to the Workspace ONE UEM.
4. Access to VMware Customer Connect Portal (username and password which will be provided by the vendor).
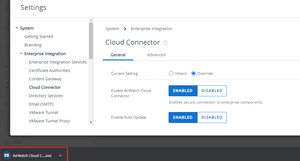
1. Enable AirWatch Cloud Connector through Workspace ONE UEM Console, so we can download this connector at the Windows Server Machine:
· From Workspace ONE UEM console, click GROUPS & SETTINGS, then click All Settings.
· Click Enterprise Integration.
· Click Cloud Connector.
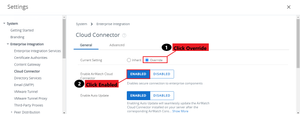
· Click Override to enable the setting for you to be managed, then click Enabled at Enable AirWatch Cloud Connector.
· Scroll down a little, then click Save.
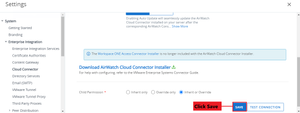
It generated the installer, which we will use in our installation at the windows server machine, which we prepared before.
2. Install AirWatch Cloud Connector at your internal server:
From the windows server machine:
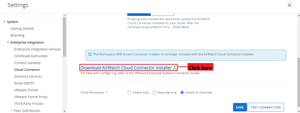
· click Download AirWatch Cloud Connector Installer.
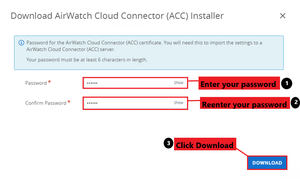
· It will ask to generate a password, so we can export the certificate anytime later, so enter your password and confirm it, then click Download (please keep this password and do not forget it).
· Click on the downloaded exe file.
· When the welcome screen appears, click Next, then accept the terms in the license agreement, then click Next, then enter the certificate password you created before, then click Next.
· Restart this windows server machine.
You have successfully installed AirWatch Cloud Connector at your internal server, we can now integrate your directory services.
3. Integrate your Active Directory settings with the Workspace ONE UEM Console:
· From Workspace ONE UEM console, click GROUPS & SETTINGS, then click All Settings.
· Click Enterprise Integration.
· Click Directory Services.
· Click Skip Wizard and configure it manually.
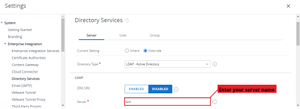
· Enter your server domain name (your company domain name).
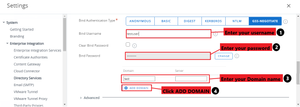
· Scroll down a little, then Enter your Bind username (your service account for internal Active directory), then enter your bind password, then add your domain and server name (it is the same), then click ADD DOMAIN, then press Save.
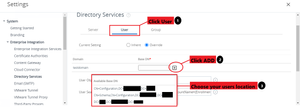
· At the top of the same screen, click User, and beside your domain name click +, then choose where your active directory users are located (Enter in a base DN for your users), then press Save, then scroll down a little, and press Save.
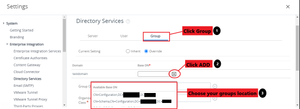
· At the top again, click Group, and beside your domain name click +, then choose where your active directory groups are located (Enter in a base DN for your groups), then scroll down a little, then press Save.
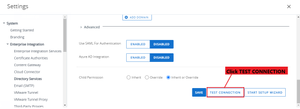
· Back again to Server, then scroll down, then click TEST CONNECTION, then you will see that the connection is successful with your server.
You have successfully integrated your directory services now, you have full connectivity to your environment through Workspace ONE UEM.
